Setting up a window tint cutting machine might sound straightforward, but the difference between a smooth installation and a costly redo often starts right here. Most people overlook the fact that temperature and humidity control are critical for film integrity in professional setups. Surprisingly, it is not the machine’s power or speed that matters most, but how you prepare your environment and every detail before the first cut that truly determines if your results will impress even the strictest clients.
Table of Contents
- Step 1: Set Up Your Window Tint Cutting Machine
- Step 2: Install and Configure the Software
- Step 3: Prepare the Tint Film and Materials
- Step 4: Input Specifications for Cutting
- Step 5: Execute the Cutting Process
- Step 6: Verify and Finalise the Cut Film
Quick Summary
| Key Point | Explanation |
|---|---|
| 1. Ensure a clean workspace | A tidy, dust-free area prevents contamination and supports optimal film application. Proper temperature and humidity control are vital for film integrity. |
| 2. Calibrate the cutting machine | Initial calibration is essential for precision. Test cuts on spare material help validate settings before proceeding to actual projects. |
| 3. Thoroughly inspect the film | Check for defects or irregularities in the film before use to ensure a flawless installation outcome. Handling with lint-free gloves is recommended. |
| 4. Input accurate specifications | Carefully enter vehicle and film details into the software to generate precise cutting patterns. This ensures a perfect fit for each application. |
| 5. Conduct a comprehensive final inspection | After cutting, meticulously check each film section for quality and adherence to original specifications. Capture documentation for professional standards. |
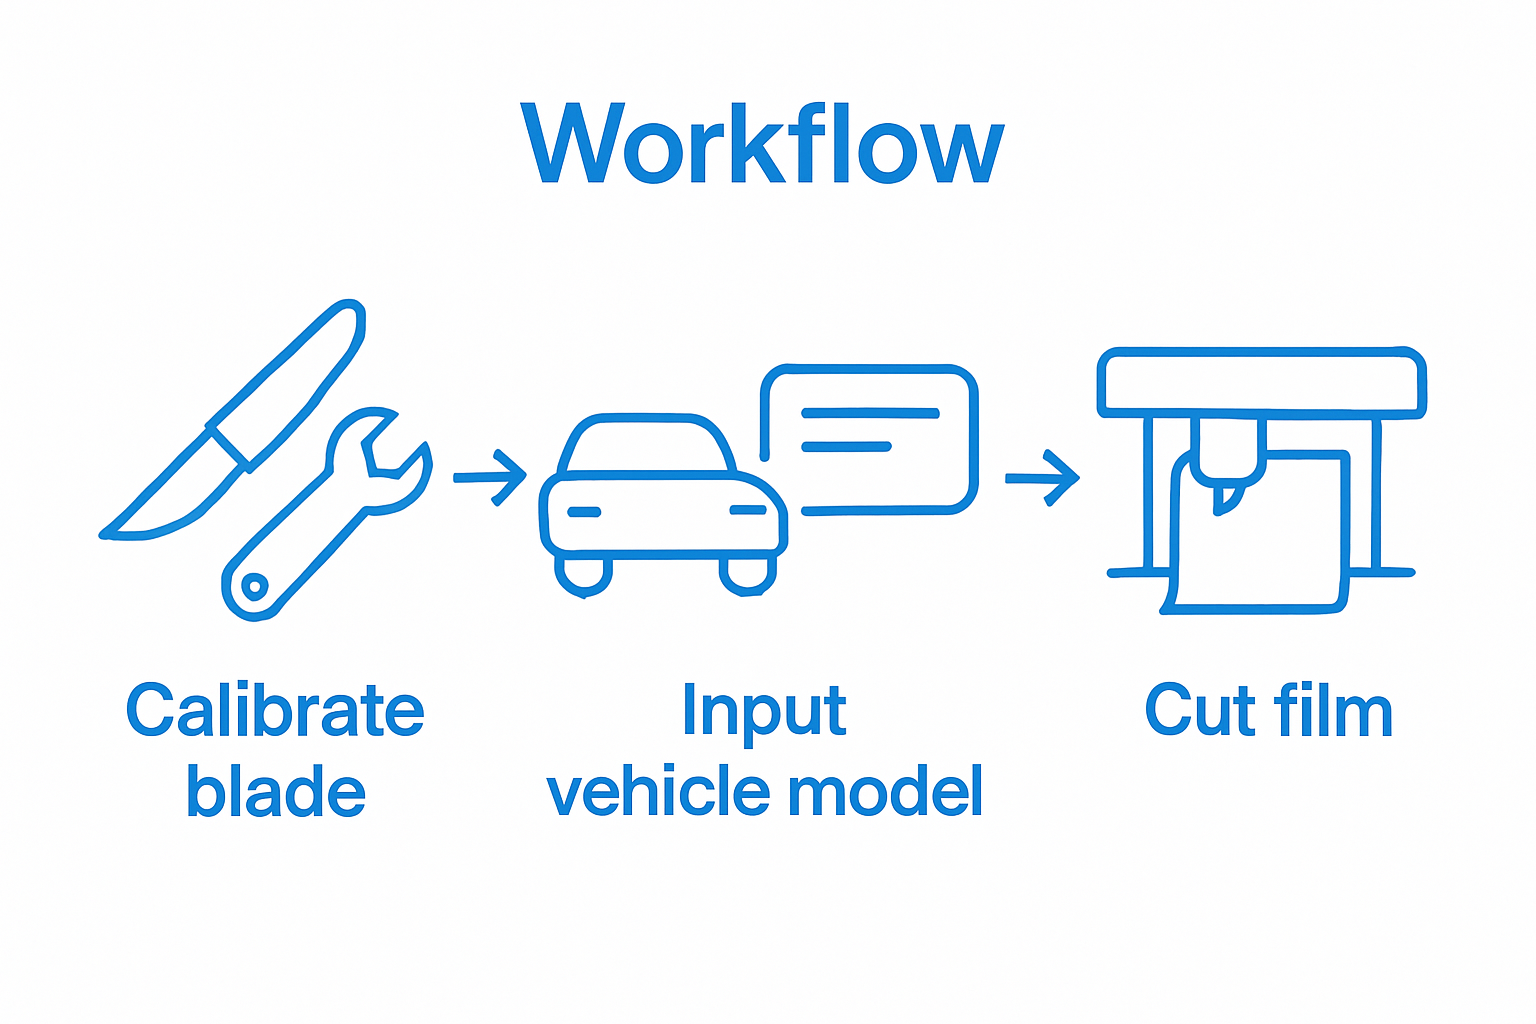
Step 1: Set Up Your Window Tint Cutting Machine
Setting up your window tint cutting machine correctly is the foundation for achieving professional grade results in automotive and architectural window film installation. Professional installers understand that precision starts with proper machine configuration and workspace preparation.
Begin by selecting a clean, well-lit workspace with a large flat surface that can comfortably accommodate your cutting machine and materials. Ensure the area is free from dust, debris, and potential contaminants that could interfere with your film cutting process. Temperature and humidity control are critical for maintaining film integrity and preventing static electricity buildup during cutting.
Carefully unpack your window tint cutting machine and review the manufacturer’s installation guidelines. Most professional cutting machines require initial calibration to ensure accurate pattern cutting. Place the machine on a stable, level surface and connect it to a reliable power source with appropriate voltage specifications. Learn more about precision cutting techniques to enhance your installation skills.
Essential preparation steps include:
- Verify all machine components are present and undamaged
- Check blade sharpness and alignment
- Confirm software compatibility with your specific cutting system
- Prepare clean microfibre cloths for machine maintenance
Calibrate your cutting machine by running diagnostic tests and making minute adjustments to blade pressure, tracking, and cutting depth. Professional installers recommend conducting test cuts on spare film material to validate machine performance before starting actual project work. Pay close attention to blade alignment and cutting precision, as even minor misalignments can result in material waste and suboptimal film fitting.
By meticulously setting up your window tint cutting machine, you establish a solid foundation for delivering high quality window film installations that meet professional standards and client expectations.
The following table provides a concise overview of the essential tools and materials required for professional window tint cutting, along with their purpose and key considerations.
| Tool/Material | Purpose | Key Consideration |
|---|---|---|
| Window tint cutting machine | Precisely cuts film to specification | Must be calibrated and placed on level surface |
| Lint-free gloves | Prevents oils and dirt from transferring onto film | Always wear before handling tint film |
| Microfibre cloths | Cleans machine parts and film material | Should be clean and free of debris |
| Software (manufacturer’s) | Generates accurate cutting patterns and controls machine | Ensure compatibility with cutting system |
| Cleaning solutions | Removes dust and contaminants from film and workspace | Use only tint-safe, residue-free solutions |
| Spare film material | For test cuts and calibration validation | Use off-cuts or ends of film rolls |
| Protective sheets | Prevents static and protects cut film sections post-cutting | Use static-free and clean materials |
Step 2: Install and Configure the Software
Installing and configuring window tint cutting software represents a critical phase in establishing a professional film installation workflow. The right software transforms your cutting machine from a basic tool into a precision instrument capable of delivering exceptional results across various vehicle and architectural applications.
Begin by downloading the software directly from the manufacturer’s official website to ensure you receive the most recent version with current pattern libraries and system updates. Verify your computer meets minimum system requirements before initiating the installation process. This typically includes checking processor speed, available hard drive space, RAM capacity, and graphics card compatibility.
Explore advanced pattern cutting techniques to maximize your software’s potential during configuration. Professional installers recommend creating a dedicated workstation computer specifically for cutting software to minimize potential conflicts and optimize performance.
During installation, carefully review each configuration screen and select options aligned with your specific cutting machine model and film type. Pay particular attention to:
- Calibration settings matching your specific cutting machine
- Film material database selections
- User profile configuration
- Network and cloud synchronization preferences
After installation, conduct a comprehensive system test by loading sample patterns and performing test cuts. Verify that the software communicates seamlessly with your cutting machine, producing precise measurements and clean cut lines. Professional installers recommend creating backup configuration profiles and maintaining regular software updates to ensure consistent performance.
Successful software installation transforms your window tint cutting workflow, enabling faster pattern generation, reduced material waste, and enhanced overall installation precision. Take time to thoroughly understand your software’s features and explore advanced customization options that can significantly improve your professional output.
Step 3: Prepare the Tint Film and Materials
Preparing window tint film and materials is a meticulous process that demands precision, attention to detail, and a systematic approach. Professional installers understand that successful film application begins long before the first cut is made, with thorough material preparation being the cornerstone of exceptional results.
Workspace preparation is crucial for maintaining film quality and preventing contamination. Select a clean, dust-free environment with controlled temperature and humidity. Ideally, set up your workspace in a room with minimal air movement, away from windows, air conditioning vents, and high traffic areas. Use a dedicated clean table covered with a soft, lint-free surface that provides smooth support for your tint film.
Explore advanced film handling techniques to enhance your professional workflow. Before handling the film, put on lint-free gloves to prevent oils and dirt from transferring onto the material. Carefully inspect each film roll for any manufacturing defects, wrinkles, or inconsistencies that might compromise the final installation.
Essential preparation steps include:
- Measure and verify film dimensions against vehicle specifications
- Check film roll for consistent color and transparency
- Ensure film is stored at recommended temperature range
- Prepare cleaning solutions and lint-free microfibre cloths
Professional installers recommend acclimating the film to room temperature for at least 30 minutes before cutting. This helps stabilize the material and reduces potential stretching or dimensional changes during the cutting process. Organize your materials methodically, laying out each roll with ample workspace around your cutting machine.
Carefully unroll a small section of film and perform a preliminary visual and tactile inspection. Look for any surface imperfections, air bubbles trapped within the material, or slight color variations that might affect the final installation. By investing time in thorough material preparation, you significantly improve the likelihood of achieving a flawless, professional window tint application.
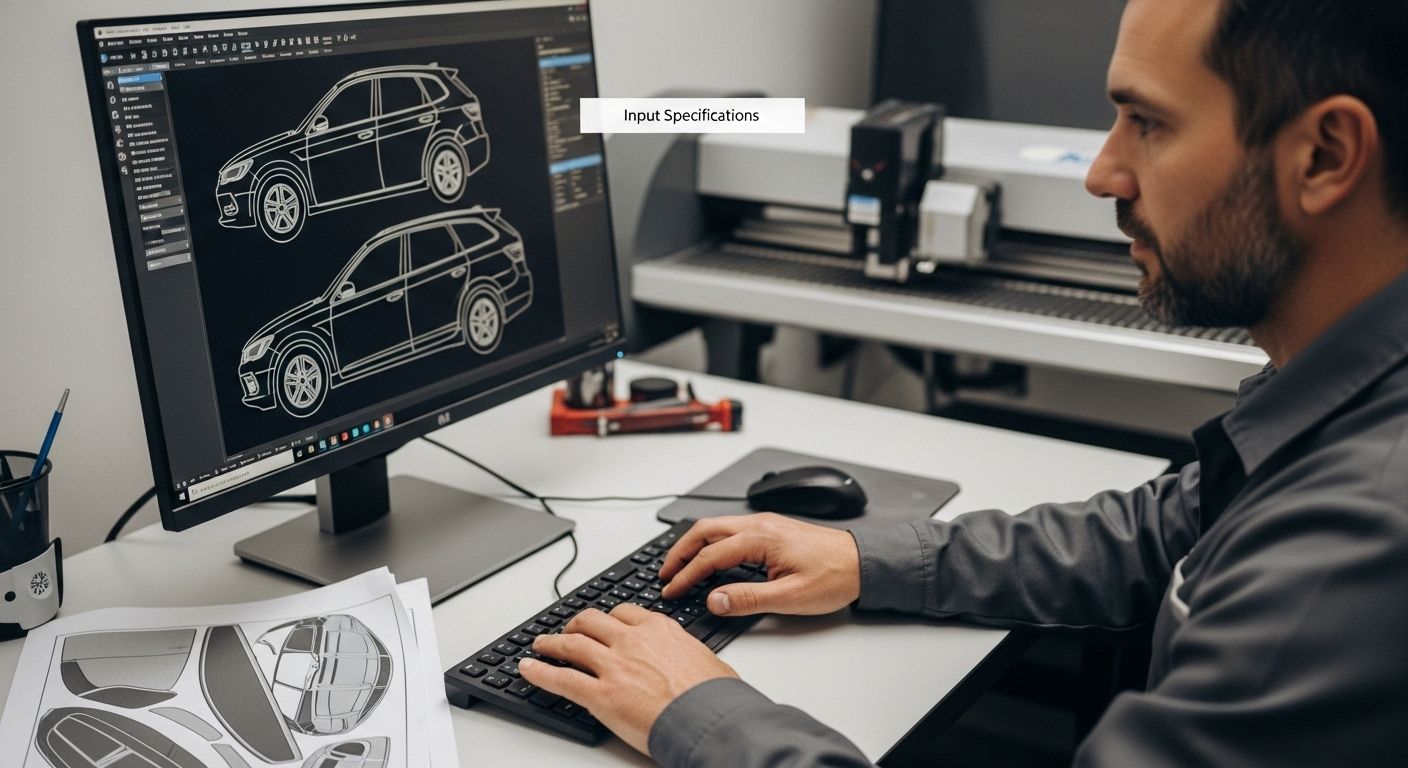
Step 4: Input Specifications for Cutting
Inputting precise specifications into your window tint cutting software represents a critical junction between technological capability and professional craftsmanship. This step transforms raw digital information into a precise cutting blueprint that determines the quality and accuracy of your final window tint installation.
Vehicle model selection is the foundation of accurate pattern generation. Navigate through your software’s vehicle database and select the exact make, model, and year of the vehicle you are working on. Professional installers understand that even minor variations in vehicle specifications can dramatically impact film fitting and overall installation quality.
Discover advanced pattern matching techniques to enhance your cutting precision. Begin by carefully measuring the actual window dimensions as a verification step. Although most software databases contain comprehensive vehicle templates, slight variations in individual vehicles may require manual adjustments.
Key specification input considerations include:
- Confirm vehicle make, model, and production year
- Select specific window panel being tinted
- Input film material type and thickness
- Specify any custom modifications or unique window shapes
Pay close attention to the software’s customization options. Many professional cutting systems offer advanced features like edge compensation, which allows minute adjustments to account for different film stretch characteristics and window curvature. Take time to understand these nuanced settings, as they can significantly improve the final cut quality.
Verify your input specifications by running a digital preview of the cutting pattern. Most advanced software provides a visual representation of the proposed cut, allowing you to inspect alignment, overlap, and potential material usage before initiating the actual cutting process. By meticulously inputting and verifying specifications, you transform generic software into a precision instrument tailored to your specific installation requirements.
Step 5: Execute the Cutting Process
Executing the cutting process represents the pivotal moment where digital precision transforms into tangible window tint film. Professional installers understand this stage as a delicate balance between technological capability and manual finesse, where every movement and setting can significantly impact the final installation quality.
Blade pressure and tracking are critical components of successful film cutting. Before initiating the full cut, perform a test strip on spare material to validate your machine’s calibration. Carefully observe how the blade moves through the film, checking for smooth tracking and consistent pressure. Any signs of hesitation or uneven cutting indicate the need for immediate machine recalibration.
Explore advanced cutting techniques to elevate your professional skills. Position your tint film with absolute precision, ensuring no wrinkles or air bubbles exist between the material and cutting surface. Professional installers recommend using alignment markers and registration points to maintain perfect film orientation throughout the cutting process.
Key execution considerations include:
- Confirm blade sharpness before starting
- Verify film is completely flat and secured
- Monitor cutting speed and pressure settings
- Watch for potential material slippage
- Maintain consistent machine and environmental temperature
As the cutting process unfolds, maintain constant visual supervision. Modern cutting machines offer remarkable automation, but human oversight remains essential.
 Watch for any unexpected resistance, unusual sounds, or slight deviations in cutting path. These subtle indicators can prevent potential material waste and ensure optimal cutting results.
Upon completion, carefully remove the cut film sections, checking each piece for precision, clean edges, and accurate dimensional matching. Professional installers understand that the cutting process is not merely about separating material but creating perfectly tailored film sections that will seamlessly integrate with vehicle windows.
Step 6: Verify and Finalise the Cut Film
Verifying and finalising the cut film represents the critical quality control phase that separates professional installers from amateur practitioners. This stage transforms precise digital cutting into a physically perfect window tint ready for installation, demanding meticulous attention to detail and systematic inspection.
Comprehensive visual inspection is paramount for ensuring film quality and accuracy. Carefully examine each cut piece under bright, indirect lighting, which reveals subtle imperfections that might be missed under standard conditions. Look for clean, sharp edges, consistent film thickness, and precise dimensional accuracy matching your original digital specifications.
Uncover professional film inspection techniques to elevate your installation standards. Professional installers recommend using lint-free gloves during handling to prevent contamination and maintain the film’s pristine surface. Gently manipulate each film section, checking for potential micro-tears, uneven edges, or slight deformations that could compromise the final installation.
Key verification steps include:
- Measure each film section against original digital template
- Check for symmetry and precise alignment
- Inspect edges for smoothness and precision
- Verify no material stress or unexpected stretching occurred
- Confirm no dust or debris is trapped in cut sections
Document your verification process by capturing high-resolution photographs of each cut film piece. These images serve multiple purposes: providing a quality record, enabling potential future adjustments, and maintaining professional documentation standards. Some advanced software systems allow direct image logging and analysis, further streamlining your verification workflow.
Finalising the cut film involves carefully packaging each section to prevent potential damage. Use clean, static-free protective sheets between film pieces, maintaining their pristine condition until installation. By executing a thorough verification process, you transform digital precision into a flawless window tint ready for professional application.
The following checklist table organises the verification and finalisation steps to ensure each piece of window tint film meets professional standards before installation.
| Verification Step | Completion Criteria |
|---|---|
| Measure each film section | Matches original digital template with no deviation |
| Check symmetry and alignment | Even, balanced fit for each piece |
| Inspect edges | Smooth, clean, and free from jagged cuts |
| Examine for material stress or stretching | No warping or distortion visible |
| Confirm absence of dust or debris | Surface is pristine and uncontaminated |
| Document with high-resolution photographs | Clear photos stored for quality records |
| Package with static-free protective sheets | Each section separated and protected until installation |
Elevate Your Window Tinting Precision for 2025 With AEONCUT
Every step in mastering window tint cutting machines and software highlights a common professional challenge: how to achieve flawless results while reducing waste, streamlining setup, and ensuring consistent pattern accuracy. If you struggle with outdated templates, time-consuming calibration, or manual errors that cut into your profits, you are not alone. The journey from workspace preparation to final quality checks is filled with small mistakes that can add up to big losses in efficiency and material. That is why leading installers are choosing AEONCUT for smarter solutions. Visit our window tint solutions page to see real advancements in software-driven precision.

Harness the power of an extensive pattern library, AI-powered auto-nesting, customisable templates, and seamless cloud-based updates—all engineered for professionals who demand perfect cuts every time. Do not get left behind as the industry moves forward. Discover flexible subscription plans, expert resources and ongoing support at AEONCUT. Start transforming the way you work today for maximum efficiency and world-class precision in every installation.
Frequently Asked Questions
How should I set up my window tint cutting machine?
Setting up your window tint cutting machine involves selecting a clean, well-lit workspace, calibrating the machine, and ensuring all components are present and functioning correctly. It’s essential to control temperature and humidity to maintain film integrity and prevent static buildup.
What are the key steps for preparing the tint film before cutting?
Preparing the tint film includes verifying its dimensions against vehicle specifications, ensuring it is clean and free from defects, and acclimating it to room temperature before cutting. Always use lint-free gloves to avoid contaminating the film.
How can I ensure precision when inputting specifications in the cutting software?
To ensure precision, select the correct vehicle make, model, and year in the software’s database, measure the actual window dimensions, and include any custom modifications needed. Reviewing the digital preview of the cutting pattern will help confirm accuracy before cutting begins.
What should I do after executing the cutting process to ensure quality?
After cutting, conduct a thorough visual inspection of each film section for clean edges, consistent thickness, and dimensional accuracy. Documenting the verification process with high-resolution photographs can help maintain quality records for future reference.
Recommended
- Top 5 PPF and Tint Cutting Software for Professionals 2025
- How Window Tint Works
- Types of Window Tint
- What is Window Tint? Essential Guide for Tinting Pros 2025
- The Key to Controlling Color on Flexible Film

