
A spotless finish is more than just good looks when it comes to paint protection film. Incorrect surface preparation is the main reason behind over 80 percent of PPF failures. Every detail matters because even a tiny bit of leftover grime or an uneven cut can mean wasted time and materials. If you want smooth results that last, mastering every step from cleaning to final inspection is what sets amateurs apart from the pros.
Table of Contents
- Step 1: Prepare the Vehicle Surface Thoroughly
- Step 2: Select and Cut Patterns Using Precision Software
- Step 3: Position and Apply PPF Film Smoothly
- Step 4: Secure Edges and Remove Imperfections
- Step 5: Inspect Installation for Flawless Results
Quick Summary
| Key Point | Explanation |
|---|---|
| 1. Thoroughly prepare the vehicle surface. | Clean all contaminants to ensure maximum paint protection film adhesion. Use soap, clay bar, and alcohol for best results. |
| 2. Utilize precision software for cutting. | Leverage cutting technology tailored to your vehicle’s specifications for accurate PPF patterns and optimal fit. |
| 3. Apply PPF film with care and patience. | Use a slip solution for positioning, avoid stretching, and systematically remove air bubbles to achieve a flawless finish. |
| 4. Secure edges and eliminate imperfections. | Trim excess film carefully and inspect under bright light for bubbles or misalignments to ensure lasting adhesion and appearance. |
| 5. Conduct a thorough final inspection. | Examine all areas closely for imperfections or adhesion issues to confirm a high-quality PPF installation before curing. |
Step 1: Prepare the Vehicle Surface Thoroughly
Successful paint protection film (PPF) installation starts with meticulous surface preparation. Your goal is to create a perfectly clean surface that allows maximum film adhesion and prevents future complications.
According to dau.edu, proper surface preparation is crucial for ensuring coating adhesion to vehicle components. This means executing a comprehensive cleaning and decontamination process that removes every potential barrier between your film and the vehicle surface.
Begin by thoroughly washing the vehicle using a professional automotive detailing soap. Remove all surface contaminants like road grime, dirt, and previous wax residues. Next, use a clay bar to extract embedded particles from the paintwork. Follow this with an intensive alcohol-based surface cleaner to eliminate any remaining oils or microscopic debris. Professional installers recommend using 70% isopropyl alcohol for the final wipe down, which ensures a completely sterile surface ready for PPF application.
Warning: Never rush this preparation stage. Skipping or performing a half hearted cleaning can lead to film lifting, bubbling, or premature failure. Take your time and be methodical.
Once your surface is immaculately clean, you are now ready to move on to the precise PPF cutting and application process.
Step 2: Select and Cut Patterns Using Precision Software
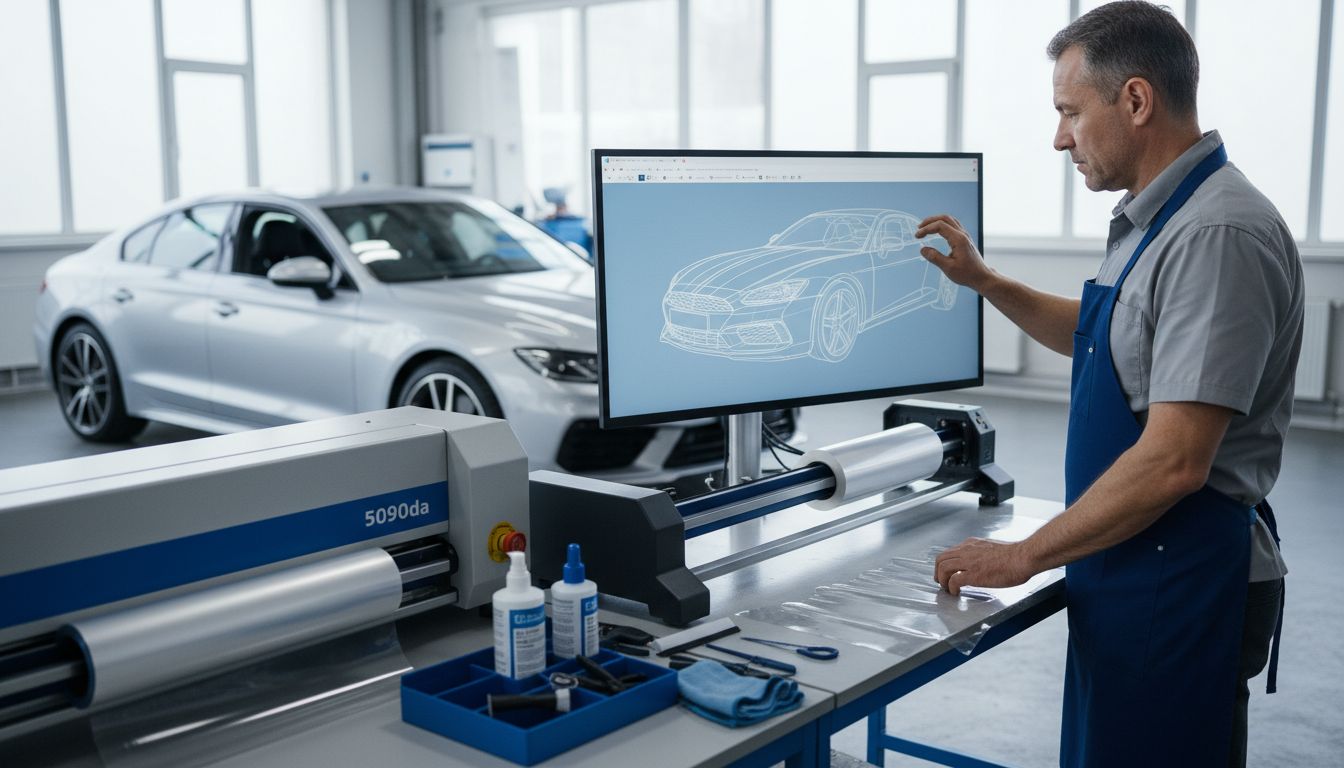
Precision software transforms PPF installation from a manual challenge into a streamlined professional process. Your goal is to leverage cutting-edge technology to create perfect film patterns for your vehicle.
According to detailingvietnam.org, utilizing pre-cut patterns through precision software allows for accurate and efficient PPF application. This method involves selecting the appropriate vehicle model and year, then using specialized machines to cut the film with exceptional accuracy.
Start by accessing your preferred PPF cutting software and selecting the exact make, model, and year of the vehicle. Input precise vehicle measurements and review the suggested cutting pattern. Most professional software platforms like AEONCUT offer comprehensive vehicle databases that include thousands of vehicle profiles. Carefully review the proposed pattern and make any necessary micro adjustments to ensure perfect coverage.
Warning: While software provides incredible precision, always double-check measurements. A millimetre difference can compromise the entire film installation.
Once you have confirmed and finalized your digital pattern, you are ready to proceed to the film cutting stage with confidence.
Step 3: Position and Apply PPF Film Smoothly
PPF film application requires precision, patience, and a methodical approach. Your goal is to create a seamless protective layer that looks professionally installed and provides maximum vehicle surface protection.
Begin by creating a clean working environment with optimal temperature and minimal dust. Spray a light application of professional slip solution onto the vehicle surface and the adhesive side of the PPF film. This solution allows you to manipulate and position the film without immediate adhesion, giving you crucial adjustment time.
Carefully align the film starting from one edge, using gentle squeegee techniques to remove air bubbles and ensure smooth contact. Work systematically from the centre outwards, using soft yet firm strokes to push out any trapped air or solution. Professional installers recommend using a heat gun at low settings to help the film conform to complex curves and edges, which helps eliminate potential lifting or bubbling issues.
Warning: Avoid stretching the film during application. Excessive tension can cause premature failure and uneven coverage. Move slowly and deliberately.
Once the film is perfectly positioned and all air pockets are removed, you are ready for the final curing process.
Step 4: Secure Edges and Remove Imperfections
The final stage of PPF installation is critical for achieving a professional and long lasting finish. Your objective is to create perfectly sealed edges and eliminate any remaining imperfections that could compromise the film’s appearance and performance.
Start by carefully trimming excess film using a precision blade, maintaining a razor sharp edge and working at a 30 degree angle. Use extremely controlled movements to ensure clean cuts along panel edges and around complex contours like door handles or side mirrors. Professional installers recommend using specialised edge cutting tools that minimise the risk of accidentally scratching the vehicle surface or creating uneven film borders.
Carefully inspect the entire surface under bright lighting to identify any remaining air bubbles or minor imperfections. Use a soft heat gun to gently warm problematic areas which will help the film settle and conform more smoothly. Apply gentle pressure with a microfibre squeegee to work out any stubborn bubbles, always moving from the centre towards the edges to prevent trapping additional air.
Warning: Never use sharp objects or excessive force when addressing imperfections. Aggressive techniques can damage both the PPF and underlying paintwork.
Once you have meticulously addressed all edges and surface details, your PPF installation is complete and ready for final curing and protection.
Step 5: Inspect Installation for Flawless Results
The final inspection is your opportunity to ensure a professional grade PPF installation that meets the highest standards of quality and precision. Your goal is to meticulously examine every detail of the film application to guarantee a flawless protective finish.
Begin your inspection under bright natural lighting or professional detailing lights that reveal even the most subtle imperfections. Check each panel systematically starting from the hood and working methodically across the vehicle. Look for telltale signs of poor installation such as tiny air bubbles trapped beneath the film tiny wrinkles near panel edges or areas where the film has not fully adhered to complex surface contours.
Utilise a combination of visual and tactile inspection techniques. Run your fingertips gently across the film surface feeling for any unevenness or bumps that might indicate incomplete installation. Pay extra attention to challenging areas like curved surfaces door handles and around side mirrors where film alignment can be most challenging. Use a microfibre cloth to wipe the surface and verify smooth consistent coverage without any unexpected texture variations.
Warning: Do not rush the inspection process. A thorough examination now can prevent potential issues that might require costly remediation later.
Once you have completed a comprehensive inspection and are fully satisfied with the results your PPF installation is ready for its final protective coating and curing process.
Unlock Flawless PPF Installation with Precision Software
Achieving a professional paint protection film application demands perfection in surface preparation, precise pattern cutting, and expert film positioning. The challenges you face in ensuring exact measurements, avoiding bubbles, and securing clean edges are familiar frustrations for every installer. With the right tools, these difficulties become manageable, letting you focus on delivering seamless, durable coverage that your customers will trust.
Experience how AEONCUT’s PPF software – AEONCUT PPF Pre-cut Cutting software revolutionises your workflow through advanced vehicle pattern libraries, AI-driven auto-nesting, and cloud-based updates. This technology empowers you to produce precise pre-cut patterns eliminating guesswork and reducing waste. Combined with expert knowledge from Paint Protection Film – AEONCUT PPF Pre-cut Cutting software, you gain the confidence required to meet the highest standards in PPF installation.

Ready to elevate your craft and achieve flawless results every time? Visit aeoncutsw.com now and discover subscription plans tailored for professional installers and serious car enthusiasts. Don’t let inaccurate cutting hold you back. Start transforming your PPF projects today with precision and efficiency.
Frequently Asked Questions
How can I ensure proper surface preparation before PPF installation?
To ensure proper surface preparation, thoroughly wash the vehicle using an automotive detailing soap, followed by using a clay bar to remove embedded contaminants. Finish with a wipe down using 70% isopropyl alcohol for a sterile surface that maximizes film adhesion.
What steps should I take to select the right PPF cutting pattern?
Access PPF cutting software, select your vehicle’s make, model, and year to generate a pre-cut pattern. Review and adjust the pattern carefully to ensure it matches your vehicle’s measurements for optimal coverage.
How do I apply the PPF film smoothly without bubbles?
Apply a light slip solution to both the vehicle surface and the adhesive side of the film to allow for movement. Align the film from one edge and use gentle squeegee techniques to push out air bubbles, working from the center outwards.
What techniques can I use to secure edges and fix imperfections after applying PPF?
Trim excess film with a precision blade at a 30-degree angle, and carefully inspect for air bubbles under bright lighting. Use a heat gun to warm problem areas and apply pressure with a microfiber squeegee to remove stubborn bubbles without damaging the film.
How do I perform a thorough final inspection of the PPF installation?
Conduct your final inspection under bright lighting by systematically checking each panel for signs of air bubbles, wrinkles, or areas lacking adhesion.
![]() Feel the surface for any unevenness and ensure that all edges are sealed properly before moving on to the final protective coating.
Feel the surface for any unevenness and ensure that all edges are sealed properly before moving on to the final protective coating.
Recommended
- Common Mistakes in PPF Installation and How to Avoid Them – AEONCUT PPF Pre-cut Cutting software
- Common Mistakes in PPF Installation and How to Avoid Them – AEONCUT PPF Pre-cut Cutting software
- Building a PPF Business in 2025: From Tools to First Clients – AEONCUT PPF Pre-cut Cutting software
- How to Create Custom PPF Patterns Using Aeoncut: Step-by-Step Guide – AEONCUT PPF Pre-cut Cutting software

