Window tinting may look simple but true professionals know there is much more involved than just sticking film to glass. The numbers are startling. Using the correct precision tools can reduce installation errors by up to 70 percent. Think the hardest part is applying the film evenly? Not quite. The real challenge appears long before the film touches a single window and it all comes down to the quality of your preparation and the sharpness of your tools.
Table of Contents
- Step 1: Gather Essential Tools And Materials
- Step 2: Prepare The Vehicle Surface For Tinting
- Step 3: Measure And Cut Tint Film With Precision
- Step 4: Position The Tint Film On The Window
- Step 5: Conduct Quality Checks For Optimal Results
Quick Summary
| Key Point | Explanation |
|---|---|
| 1. Use Professional-Grade Tools | High-quality tools ensure precision and improve the final appearance of your tinting project. |
| 2. Thoroughly Clean the Window Surface | Cleaning removes all contaminants, allowing for perfect film adhesion and a professional finish. |
| 3. Create Precise Templates for Cutting | Accurate templates are essential for seamless film application and to prevent waste. |
| 4. Employ a Methodical Positioning Technique | Carefully position the film to avoid bubbles and misalignments for a flawless installation. |
| 5. Conduct Rigorous Quality Checks | Inspect the installation under various lighting to ensure adhesion and appearance meet professional standards. |
Step 1: Gather Essential Tools and Materials
Beginning your window tint cutting project requires precise preparation and the right equipment. Professional installerss know that success depends on having a comprehensive toolkit ready before making the first cut. The quality of your tools directly influences the precision and final appearance of your tint installation.
Your essential toolkit should include high-quality professional-grade instruments specifically designed for window tint cutting. Start with a professional-grade cutting mat that provides a smooth, self-healing surface protecting both your work surface and cutting tools. Choose a mat with grid lines to help maintain straight edges and consistent measurements.
Next, select precision cutting tools that ensure clean, accurate cuts. A professional vinyl cutting knife with replaceable blades is crucial. Look for knives with ergonomic handles that provide comfortable grip and control during intricate cutting patterns. Ceramic blades offer superior sharpness and durability compared to standard metal blades, reducing material drag and preventing film tearing.
For measuring and alignment, invest in high-quality measuring tools like a professional-grade measuring tape, metal ruler with clear markings, and a precision squeegee. These tools help you create exact template measurements and ensure smooth film application. Digital measuring tools can provide extra accuracy for complex window shapes.
Personal protective equipment is equally important. Wear lint-free gloves to prevent fingerprint transfer and maintain film cleanliness. Safety glasses protecting against potential cutting debris are recommended. Clean microfibre cloths will help manage film surfaces and remove dust or debris during the cutting process.
Below is a table summarising the essential tools and materials required for professional-grade window tint cutting, including their purpose and key specifications.
| Tool/Material | Purpose | Key Specification/Detail |
|---|---|---|
| Professional cutting mat | Provides smooth, protected cutting surface | Self-healing, with grid lines for accuracy |
| Precision vinyl cutting knife | Ensures clean, accurate cuts | Ergonomic handle, replaceable/ceramic blade |
| Metal ruler | Guides straight, consistent measurements | Clear, high-contrast markings |
| Measuring tape | Measures template sizes and window dimensions | Professional-grade, marked units |
| Precision squeegee | Smooths and adheres film during application | Made for tint film, ergonomic design |
| Lint-free gloves | Prevents fingerprints on film and glass | High-quality, suitable for delicate work |
| Safety glasses | Protects eyes from cutting debris | Clear, well-fitting, comfortable |
| Microfibre cloths | Cleans glass, manages film surfaces | Lint-free, clean, soft |
Explore advanced cutting techniques for professional-level results. Preparing your workspace with proper lighting, a clean environment, and all necessary tools will set the foundation for a successful tint cutting project.
Step 2: Prepare the Vehicle Surface for Tinting
Successful window tinting begins with meticulous surface preparation, a critical step that determines the quality and longevity of your installation. Professional installerss understand that even the most precise cutting techniques can be compromised by inadequate surface preparation. Your goal is to create an immaculate, contaminant-free environment that allows the tint film to adhere perfectly.
Start by completely cleaning the vehicle windows using a professional-grade glass cleaner specifically designed for automotive applications. Avoid household cleaners containing ammonia, which can damage window surfaces and tint film adhesive. Use lint-free microfibre cloths to prevent introducing additional debris during the cleaning process. Work systematically, cleaning both the interior and exterior glass surfaces multiple times to remove all dirt, dust, oils, and residue.
After initial cleaning, perform a detailed surface inspection using bright, direct lighting. This helps reveal microscopic imperfections such as small scratches, mineral deposits, or remnants of previous tint adhesive. For windows with existing tint, check out best practices for complete removal to ensure a clean surface. Use a razor blade at a 45-degree angle to gently scrape away any stubborn residue, being careful not to scratch the glass surface.
Prepare a final cleaning solution combining isopropyl alcohol and water in a 50/50 mixture. This solution effectively removes any remaining contaminants and ensures a sterile surface for tint application. Spray the solution onto a clean microfibre cloth rather than directly onto the window to prevent liquid accumulation around window seals and electronics. Wipe in a systematic pattern, rotating the cloth frequently to prevent redepositing removed contaminants.
Before beginning the tint installation, create a controlled environment. Close windows and doors to minimize dust introduction, and work in a clean, temperature-controlled space with minimal air movement. Wear lint-free gloves to prevent skin oils from transferring to the glass surface. Your thorough preparation sets the foundation for a professional-quality window tint installation that will look exceptional and last for years.
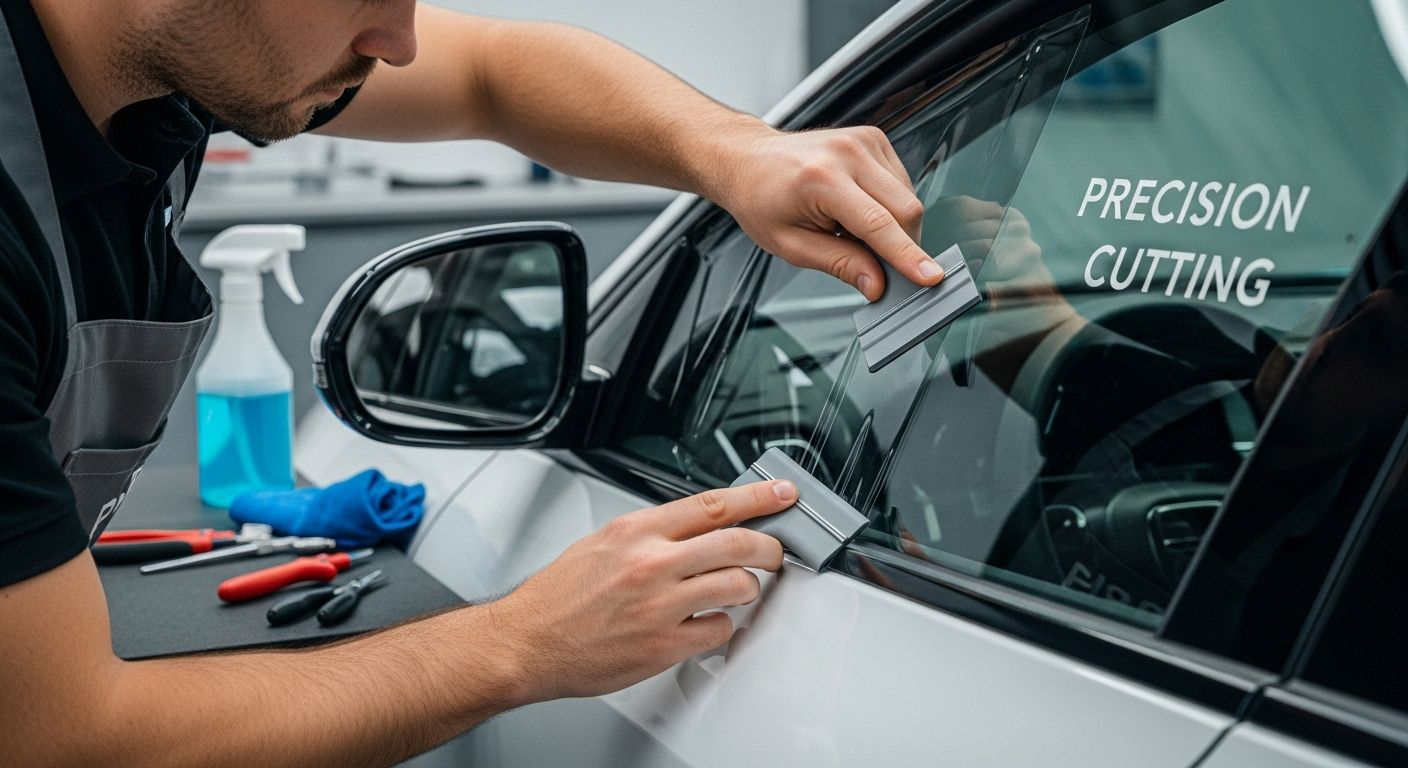
Step 3: Measure and Cut Tint Film with Precision
Precision is the cornerstone of professional window tinting, transforming a good installation into an exceptional one. Professional installerss know that accurate measurement and cutting determine the final quality of the tint application. Your goal is to create seamless, perfectly fitted window film that looks factory-installed.
Begin by creating a precise template for each window. Position your tint film on a clean cutting mat with the protective liner facing upward. Use a combination of digital measurements and physical templates to ensure accuracy. Explore advanced cutting techniques that can streamline this process and reduce material waste. Carefully trace the window’s outline using a sharp ceramic blade, maintaining a consistent margin that allows for slight adjustments during installation.
When cutting, use deliberate, controlled movements with your precision cutting tool. Hold the blade at a consistent 45-degree angle to create clean, smooth edges. Professional installerss recommend making multiple light passes rather than attempting to cut through the film in a single aggressive stroke. This technique prevents material tearing and ensures a more precise cut. Apply gentle, even pressure to maintain control and prevent the blade from wandering.
For complex window shapes, break down the cutting process into manageable sections. Start with straight edges, then carefully navigate curves and corners. Use your metal ruler as a guide for straight cuts, positioning it slightly inside your traced line to account for potential blade drift. When cutting around curved areas, rotate the film rather than the blade, maintaining a steady hand and consistent pressure.
Verify your cut by carefully peeling back a small section of the protective liner. Check for clean, precise edges with no fraying or uneven sections. Imperfect cuts can lead to visible lines, bubbling, or premature film failure. If you detect any inconsistencies, it’s better to start over with a new piece of film than to attempt repairs. Professional-grade tint films are designed for single-use precision, and attempting to patch or modify a cut film often results in suboptimal results.
Remember that patience and practice are your greatest tools. Each window presents a unique challenge, and mastering the art of precision cutting takes time and attention to detail.
 Maintain a steady hand, use high-quality tools, and approach each cut with methodical concentration.
Step 4: Position the Tint Film on the Window
Positioning tint film requires surgical precision and a methodical approach that separates professional installerss from amateur enthusiasts. The goal is to achieve a flawless application with zero air bubbles, wrinkles, or misalignments that could compromises the film’s appearance and performance.
Begin by creating a light mist of application solution on the interior window surface. This solution helps the film slide into perfect position and allows for minor adjustments during initial placement. Learn advanced techniques for complex window surfaces to handle challenging window shapes effectively. Carefully remove the protective backing from your pre-cut film, holding the film by its edges to prevent contamination from skin oils or dust.
Align the film with absolute precision, starting at the top of the window and working downward. Professional installerss recommend using the window’s top edge as a primary reference point, ensuring the film is positioned symmetrically with minimal overlap on window seals. Hold the film slightly above the glass and slowly lower it, allowing the application solution to help it settle smoothly. Use gentle, consistent pressure from the center outward to minimize air bubble formation.
Employ a professional squeegee technique to secure the film, working from the center toward the edges using overlapping vertical strokes. Maintain a 45-degree angle with the squeegee, applying firm but controlled pressure. This method helps push out trapped moisture and air, creating a seamless bond between the film and glass surface. Pay extra attention to window corners and edges, where air bubbles frequently accumulate.
Verify your positioning by checking for critical alignment indicators. These include consistent margins around window edges, no visible gaps or overlaps, and a smooth surface without ripples or waves. If you detect minor imperfections, carefully lift the film using the application solution and reposition. However, be cautious not to overhandle the film, as excessive manipulation can introduce contaminants or stretch the material.
Professional window tinting demands patience and precision.
 Take your time during positioning, understanding that rushing this step can result in costly mistakes. A methodical approach ensures a professional-quality finish that looks factory-installed and performs exceptionally across various environmental conditions.
Step 5: Conduct Quality Checks for Optimal Results
The final stage of window tinting transforms your meticulous work into a professional-grade installation. Quality checks are not merely a formality but the critical moment where precision meets perfection. Professional installerss understand that thorough inspection determines the difference between an acceptable and an exceptional tint application.
Begin your quality assessment by examining the film under varied lighting conditions. Natural daylight provides the most accurate evaluation, revealing subtle imperfections that artificial lighting might conceal. Explore advanced diagnostic techniques to enhance your quality control process. Use a bright, direct light source positioned at multiple angles to highlight potential issues such as microscopic air bubbles, edge lifting, or uneven application.
Carefully inspect the film’s edges and corners, which are most prone to potential failure points. Run your gloved fingertips along the window’s perimeter, feeling for any irregularities in adhesion. Look for consistent margins around window edges, checking that the film sits precisely without overlapping window seals or creating unsightly gaps. Professional installerss recommend a systematic approach: start at the top of the window and methodically work downward, examining each section with deliberate attention.
Conduct a moisture displacement test by gently pressing a soft, lint-free microfibre cloth against the film’s surface. Any remaining moisture should be transparent and easily squeegeed out. Cloudy or milky areas indicate trapped moisture or incomplete adhesion, which could lead to long-term performance issues. Pay special attention to corners and edges, where moisture tends to accumulate during installation.
Verify the film’s performance by checking its visual and tactile qualities. The surface should appear uniformly smooth, without waves, ripples, or visible cutting marks. When viewed from different angles, the tint should have a consistent color and transparency. Perform a final visual clarity test by stepping back and observing the window from both interior and exterior perspectives, ensuring the installation meets professional standards.
This table outlines the key inspection points and quality checks to ensure a professional window tint installation, helping you identify and correct issues before finalising your work.
| Quality Check | What to Look For | Method of Verification |
|---|---|---|
| Lighting conditions | Subtle imperfections, air bubbles, edge lifting | Examine under natural and direct lighting |
| Film adhesion (edges) | Consistent attachment, no lifting | Feel along edge with gloved fingertips |
| Margins and alignment | Symmetrical margins, no gaps or overlaps | Visually check perimeter of each window |
| Moisture displacement | No cloudy or milky areas, only transparent moisture | Press with microfibre cloth, squeegee if needed |
| Surface appearance | Uniform smoothness, no waves, ripples, marks | Visual and tactile check of interior surface |
| Colour/clarity consistency | Even tint colour and transparency from all angles | Step back, view from inside and outside |
Remember that patience during the quality check process prevents future complications. A few extra minutes of careful inspection can save hours of potential rework and maintain your reputation as a skilled professional. Each window tint installation is a reflection of your craftsmanship, and these final checks transform technical skill into artistic precision.
Precision Window Tinting Starts with the Right Tools and Techniques
Struggling to achieve flawless precision when cutting and applying window tint? Many professionals and passionate enthusiasts experience wasted film, uneven edges, and time-consuming rework. This guide focused on perfect measurements, clean cuts, and smooth installations—yet even with the best manual techniques, minor errors can lead to lost profits and disappointing results.
Discover the AEONCUT Window Tint category for cutting-edge solutions designed exclusively for those who demand perfection every time.

Say goodbye to uneven cuts and material waste. AEONCUT offers a complete software platform that delivers pre-cut patterns with AI-driven accuracy, no matter your vehicle make or model. Access a vast library of customisable templates, fast cloud updates, and powerful pattern nesting, all backed by expert support. Join professionals using AEONCUT’s innovative solutions to transform their workflow. Explore our featured technologies and claim your spot at the forefront of precision tinting. Take your expertise to the next level today.
Frequently Asked Questions
What tools do I need for precision window tint cutting?
You will need a professional-grade cutting mat, precision cutting tools like vinyl cutting knives with replaceable blades, high-quality measuring tools such as a metal ruler and measuring tape, and personal protective equipment like lint-free gloves and safety glasses.
How do I prepare the vehicle surface before applying tint film?
Begin by thoroughly cleaning the windows with a professional-grade glass cleaner, avoiding ammonia-based products. Perform a detailed inspection under bright lighting to identify imperfections and use a 50/50 mixture of isopropyl alcohol and water for a final clean to ensure a sterile surface for the tint application.
What techniques can I use for precise measuring and cutting of tint film?
Create a precise template for each window using digital measurements and physical templates. Use a sharp ceramic blade at a 45-degree angle, making multiple light passes for accurate cuts. Employ a metal ruler for straight edges and rotate the film instead of the blade for curves to maintain control and precision.
How do I ensure a smooth application of tint film without bubbles?
Mist the window surface with an application solution before positioning the film. Carefully align the film, starting from the top and working downward, using a professional squeegee at a 45-degree angle to push out air and moisture from the centre outward. Regularly check for positioning and make minor adjustments if necessary, taking care not to overhandle the film.
Recommended
- Tinting Curved Windows
- Master Window Tint Cutting Machine and Software for 2025
- Tinting Curved Windows
- How to Cut Window Film
- The Key to Controlling Color on Flexible Film
- Using Stencils on Wood

