
Caring for your car’s window tint often sounds straightforward and quick. Many drivers do not realise that using the wrong cloth or cleaner can wreak havoc in minutes and even void your warranty or force a costly full tint replacement. Most surprising of all though, it turns out that careful workspace preparation and a few key habits before you start cleaning are what make all the difference for long-lasting, flawless tint.
Table of Contents
- Step 1: Prepare Your Maintenance Area For Cleaning
- Step 2: Gather Necessary Cleaning Supplies And Tools
- Step 3: Clean The Interior And Exterior Of The Windows
- Step 4: Inspect The Window Tint For Damage Or Peeling
- Step 5: Apply Protective Solutions To Enhance Tint Longevity
- Step 6: Document Maintenance Activities And Schedule Future Checks
Quick Summary
| Key Point | Explanation |
|---|---|
| 1. Establish a Clean Workspace | Create a dust-free, well-lit area for maintaining window tint to ensure effective cleaning and protect your investment. |
| 2. Use Specialized Cleaning Solutions | Avoid generic cleaners; instead, opt for professional-grade solutions specifically formulated for window tint to prevent damage. |
| 3. Implement Gentle Cleaning Techniques | Use soft microfibre cloths with gentle, systematic motions to clean both interior and exterior surfaces without damaging the tint. |
| 4. Regularly Inspect for Damage | Conduct thorough visual and tactile inspections to detect early signs of wear or damage, preventing costly repairs. |
| 5. Document Maintenance Activities | Keep a detailed record of all maintenance tasks, products used, and observations to track the condition and warranty of your window tint. |
Step 1: Prepare Your Maintenance Area for Cleaning
Successful window tint maintenance begins with creating a clean, organized workspace designed to protect your investment and ensure precision. Professional installers understand that proper preparation minimizes potential damage and sets the foundation for exceptional results. Before touching any cleaning materials, you will need to establish a controlled environment that supports meticulous window tint care.
Start by selecting a workspace with controlled temperature and minimal dust particles. An indoor area with good lighting is ideal, preferably away from direct sunlight and outdoor contaminants. Ensure your workspace has a stable, clean surface where you can lay out your tools and work systematically. A dedicated workbench or large, clean table covered with a soft, lint-free cloth provides the perfect surface for your maintenance process.
Below is a summary table of essential tools and materials for window tint maintenance, including their specific purposes, to help you organise your workspace and cleaning process effectively.
| Tool/Material | Purpose |
|---|---|
| Soft microfibre cloths | Safe cleaning of tint without scratching |
| Specialised tint cleaning solution | Gentle, tint-safe cleaning without damage |
| Distilled water | Rinsing and dilution to avoid mineral spots |
| Spray bottles | Even and controlled application of solutions |
| Soft, lint-free towels | Drying surfaces without leaving lint |
| Plastic scraper (optional) | Gentle edge cleaning without abrasion |
| Protective gloves | Prevent oil and dirt transfer from hands |
Gather your essential tools and materials before beginning. Your professional window tint maintenance kit should include:
- Soft microfibre cloths (multiple clean ones)
- Specialized window tint cleaning solution
- Distilled water
- Spray bottles
- Soft, lint-free towels
- Plastic scraper (optional, for gentle edge cleaning)
- Protective gloves
Prepare your cleaning solutions carefully. Mix your specialized window tint cleaner according to manufacturer instructions, and have distilled water ready for rinsing. Avoid using household cleaners or generic glass cleaners, which can potentially damage the tint film. Check out our guide on professional car interior cleaning for additional insights into maintaining a pristine workspace.
Before starting, wear clean protective gloves to prevent oil and dirt transfer from your hands to the delicate tint surface. Ensure all your tools are clean and free from debris that could scratch the window tint. By methodically preparing your maintenance area, you set the stage for a successful, professional-grade window tint care routine that will help preserve the film’s integrity and appearance.
Step 2: Gather Necessary Cleaning Supplies and Tools
Selecting the right cleaning supplies is crucial for maintaining window tint without causing damage. Professional window tint maintenance requires precision and specialized equipment that protects the delicate film while effectively removing dirt and maintaining its appearance. Understanding the specific tools and solutions needed will help you preserve your window tint investment.
Cleaning Solution Selection is perhaps the most critical aspect of your preparation. Avoid generic glass cleaners, which often contain ammonia or harsh chemicals that can deteriorate tint film. Instead, invest in a professional-grade window tint cleaning solution specifically formulated for automotive window films. These specialized solutions are designed to clean effectively without breaking down the adhesive or causing discoloration.
Your comprehensive window tint maintenance toolkit should include:
- Soft, lint-free microfibre cloths (multiple clean cloths)
- Distilled water
- Specialized window tint cleaning solution
- Soft rubber squeegee
- Spray bottles
- Protective gloves
- Soft plastic scraper
- Clean, dry towels
Quality microfibre cloths are your primary cleaning tools. Choose cloths with a tight weave and no added fabric softeners, which can leave residue. Wash new microfibre cloths before first use to remove any manufacturing chemicals. Avoid paper towels or rough cloths that might scratch the tint surface.
Learn more about removing old window tint and maintaining your vehicle’s appearance for additional professional insights. Purchasing professional-grade tools might seem like an added expense, but it protects your window tint from potential costly damage. Remember that using incorrect cleaning materials can void warranties and require complete tint replacement, making your initial investment in quality tools incredibly worthwhile.
Verify your toolkit by checking each item for cleanliness, appropriate softness, and compatibility with window tint surfaces. Properly prepared tools set the foundation for successful window tint maintenance and long-lasting, pristine results.
Step 3: Clean the Interior and Exterior of the Windows
Cleaning window tints requires a systematic, gentle approach that protects the delicate film while thoroughly removing dirt and contaminants. Professional window tint maintenance demands precision and careful technique to prevent potential damage during the cleaning process. Your goal is to achieve a spotless, streak-free finish without compromising the tint’s integrity.
Begin with the interior window surface, which typically accumulates more delicate contaminants like dust, fingerprints, and interior film residue. Spray your specialized tint-safe cleaning solution onto a clean microfibre cloth rather than directly onto the window. This method prevents oversaturation and potential solution seepage between the tint and glass. Gently wipe the interior surface using horizontal strokes, applying light, consistent pressure. Work methodically from top to bottom, rotating your microfibre cloth to ensure you are always using a clean section.
For the exterior cleaning, slightly different techniques apply. Start by rinsing the window with clean water to remove loose debris that might scratch the tint during cleaning. Use your soft microfibre cloth with the tint-safe cleaning solution, working in a systematic vertical motion. Pay extra attention to edges and corners where dirt tends to accumulate. Avoid applying excessive pressure, which could potentially lift or damage the window tint.
Critical cleaning considerations include:
- Always use clean microfibre cloths for each window
- Work in a shaded area to prevent cleaning solution from drying too quickly
- Use minimal moisture to prevent potential adhesive degradation
- Inspect the tint for any signs of damage during cleaning
Explore our comprehensive car interior cleaning guide for additional professional maintenance insights. After cleaning, use a dry, clean microfibre cloth to buff the window, removing any remaining moisture or potential streaks. Verify your cleaning success by checking the window from multiple angles in good lighting, ensuring a crystal-clear, uniform appearance without water spots, streaks, or residual dirt.
Remember that patience and gentle technique are your best tools in maintaining pristine window tints. By following these methodical cleaning steps, you will preserve the appearance and functionality of your window tint investment.
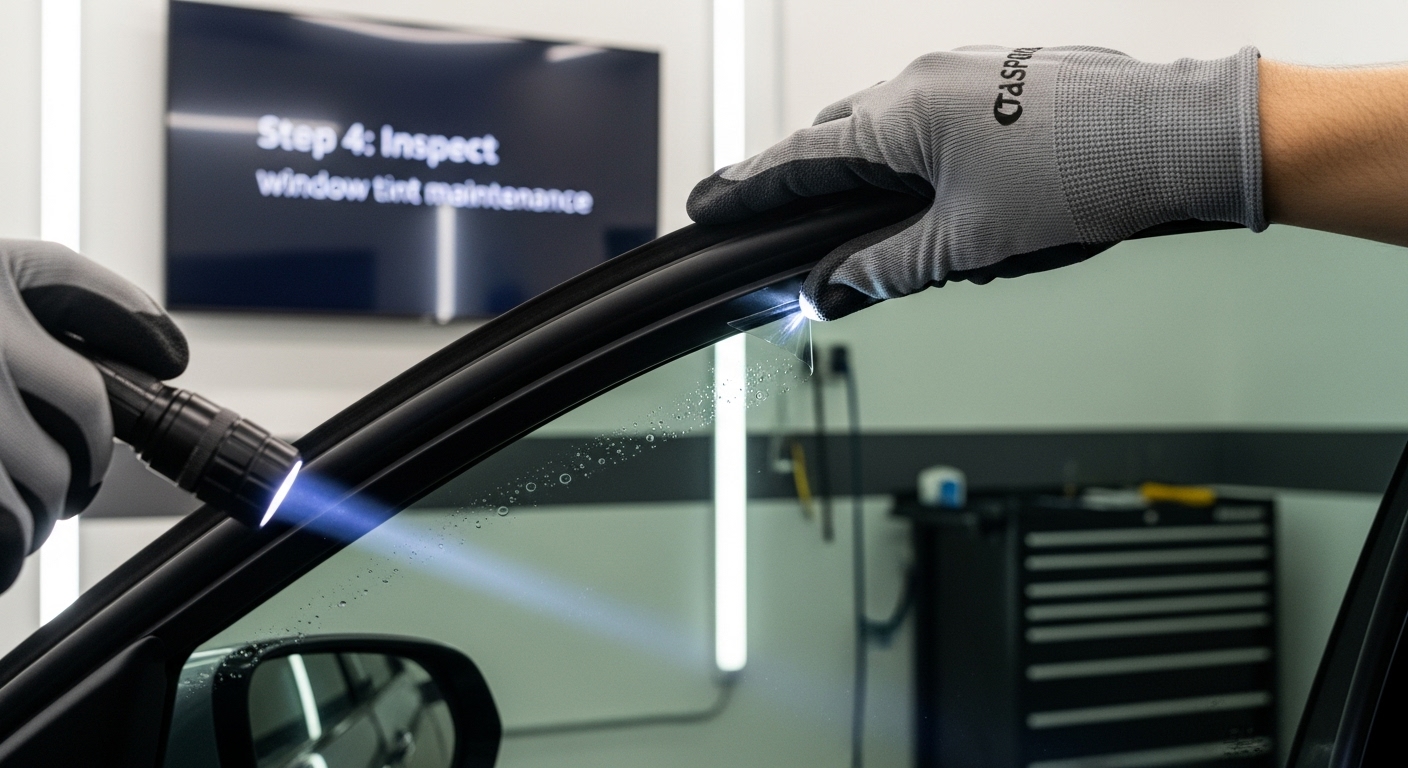
Step 4: Inspect the Window Tint for Damage or Peeling
Thorough window tint inspection is a critical maintenance step that prevents minor issues from escalating into costly replacements. Professional window tint maintenance requires a meticulous, systematic approach to identifying potential damage early. Your visual and tactile examination will reveal subtle signs of wear that might compromise the tint’s performance and aesthetic quality.
Lighting is crucial during your inspection. Choose a well-lit area with natural daylight, preferably near a large window or outdoors in indirect sunlight. Artificial overhead lighting can create shadows that might obscure subtle imperfections. Hold a clean, bright flashlight at various angles to illuminate the window tint, helping you detect microscopic bubbles, scratches, or separation points that might not be immediately visible.
Begin your inspection by running your gloved hand gently across the window tint surface. Feel for any irregularities such as:
- Tiny bubbles beneath the film
- Areas of lifting or peeling edges
- Rough or uneven texture
- Discoloration or fading
- Scratch marks or abrasions
Discover more about window tint technology and common wear patterns to enhance your understanding of potential damage indicators. Pay special attention to high-stress areas like window edges, corners, and regions frequently exposed to direct sunlight. These zones are most susceptible to degradation and can reveal early signs of tint failure.
When examining each window, divide the surface into quadrants and inspect systematically. Start from the top left, move to top right, then bottom left, and finally bottom right. This methodical approach ensures you do not miss any potential issues. Look for telltale signs of adhesive breakdown, including tiny air pockets, slight discoloration, or a milky appearance that indicates the tint is separating from the glass.
Your inspection is complete when you have thoroughly examined every window, documented any discovered imperfections, and determined whether professional repair or replacement is necessary.
 Remember that early detection of window tint damage can save significant time and expense in future maintenance.
Step 5: Apply Protective Solutions to Enhance Tint Longevity
Protective solutions are the final frontier in window tint maintenance, creating a barrier that shields your investment from environmental degradation and potential damage. Professional-grade protective treatments extend the life of your window tint by providing additional resistance against UV radiation, minor abrasions, and environmental contaminants.
Selecting the right protective solution is paramount to successful window tint preservation. Look for specialized products designed specifically for automotive window films that offer UV protection, water repellency, and anti-static properties. These solutions form an invisible protective layer that helps prevent dust accumulation, reduces surface tension, and minimizes the potential for scratches.
Application requires precision and careful technique. Begin by ensuring the window surface is absolutely clean and free from any residual moisture or cleaning solution. Shake your protective solution thoroughly to ensure proper chemical distribution. Apply the solution using a clean, lint-free microfibre applicator, working in systematic horizontal and vertical motions to guarantee even coverage.
Critical application considerations include:
- Apply in a controlled environment with stable temperature
- Use consistent, light pressure during application
- Avoid over-application that might create streaks
- Work in small sections to maintain precise control
- Allow sufficient drying time between coats
Explore professional insights on protective film lifespan and maintenance for additional professional recommendations. After application, allow the protective solution to cure completely, which typically takes between 24 to 48 hours depending on the specific product and environmental conditions.
Verify successful application by checking for a uniform, streak-free finish. The treated surface should appear slightly more glossy and feel smoother to the touch. Direct sunlight can help reveal any uneven areas that might require additional attention. Remember that proper application of protective solutions not only enhances the aesthetic appeal of your window tint but also provides a critical layer of defence against potential environmental damage.
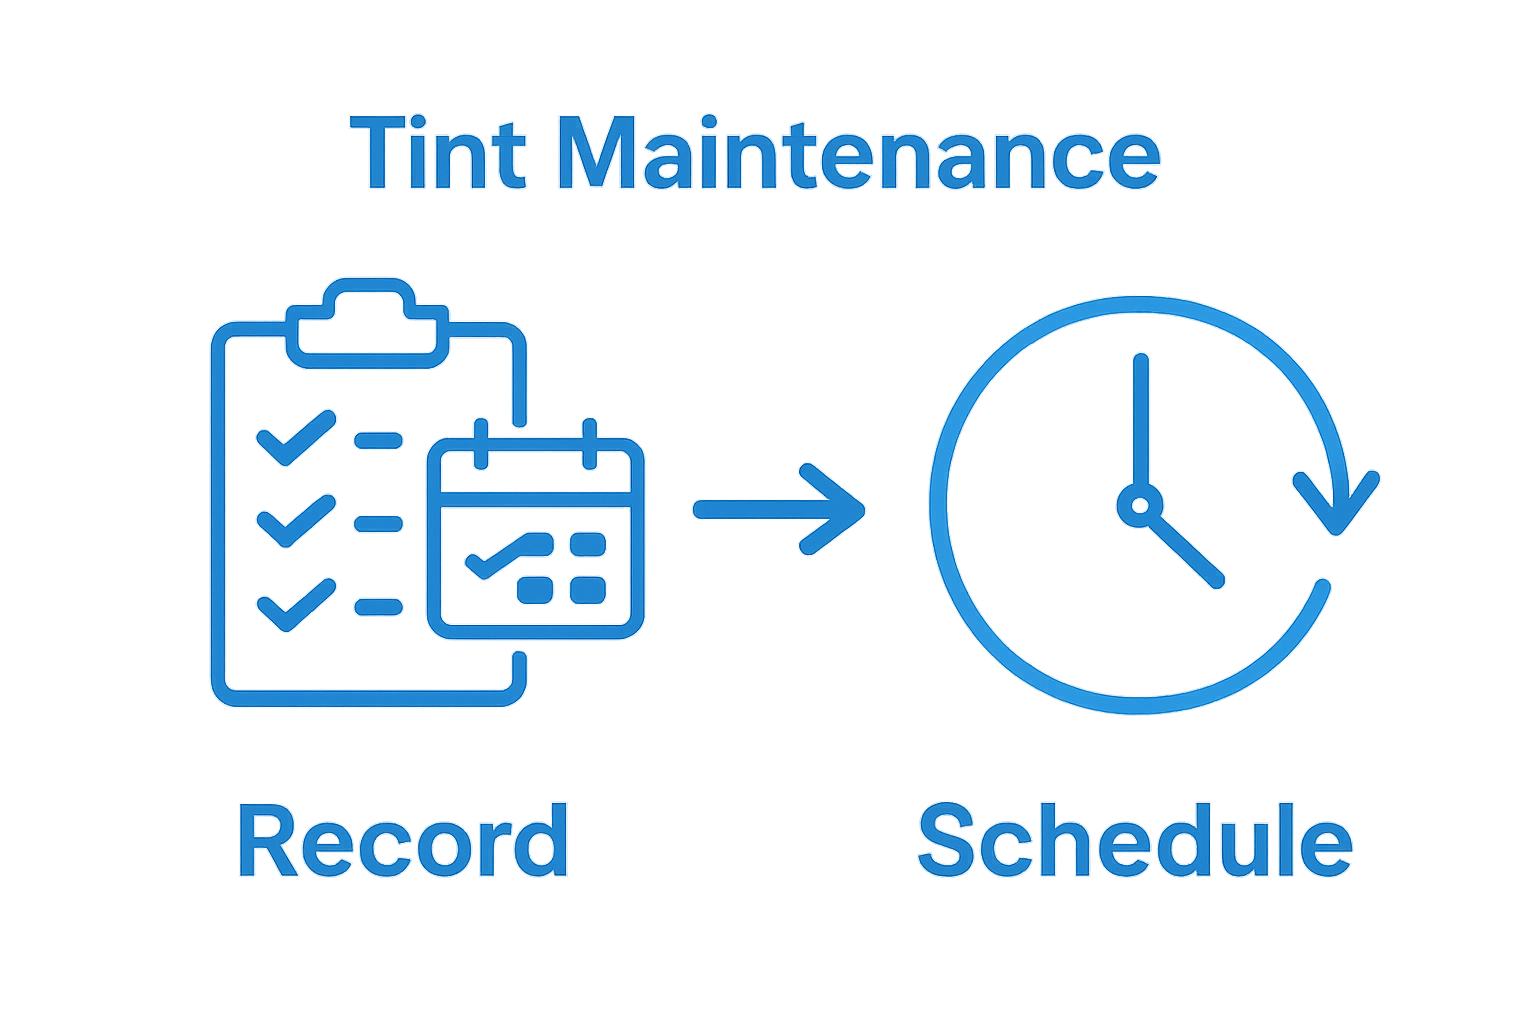
Step 6: Document Maintenance Activities and Schedule Future Checks
Documenting window tint maintenance is more than a record-keeping exercise it is a strategic approach to preserving your vehicle’s aesthetic and functional value. Professional maintenance tracking allows you to monitor the condition of your window tints, anticipate potential issues, and maintain a comprehensive history of care that can be valuable for warranty purposes and future resale.
Create a dedicated maintenance logbook specifically for your vehicle’s window tints. This can be a physical notebook or a digital spreadsheet, but consistency is key. Your documentation should include detailed entries that capture the nuances of each maintenance session. Key information to record includes the date of maintenance, specific cleaning products used, any observed conditions or potential issues, and the overall condition of the window tint after each cleaning and inspection.
Establish a systematic maintenance schedule tailored to your vehicle’s specific environment and usage. Vehicles exposed to intense sunlight, coastal environments, or extreme temperatures will require more frequent maintenance compared to those in milder conditions. Typical professional recommendations suggest conducting a comprehensive window tint inspection and maintenance routine every three to four months, with more frequent light cleaning as needed.
Critical documentation elements include:
- Date of maintenance
- Products and solutions used
- Condition of window tint
- Observations of wear or damage
- Recommended future actions
Learn more about professional maintenance tracking strategies for comprehensive vehicle care. Digital tools and smartphone apps can streamline this process, allowing you to set automatic reminders and maintain a cloud-based record of your maintenance history.
Verify the effectiveness of your documentation system by ensuring each maintenance session is thoroughly recorded, with clear, legible notes that provide a comprehensive overview of your window tint’s condition over time.
Here is a convenient checklist table to record and track your window tint maintenance activities, helping you monitor key details after each session for warranty and care purposes.
| Date | Cleaning Products Used | Observations | Condition of Tint | Recommended Action |
|---|---|---|---|---|
Upgrade Your Window Tint Results With Cutting-Edge Solutions
Tired of struggling to keep your window tint damage-free and flawless? It is clear that regular maintenance and the right tools are vital to preserving both the appearance and performance of your window films. As mentioned in this guide, issues such as scratches, peeling, and using improper cleaning methods can quickly lead to costly replacements and wasted time. Many installers and enthusiasts face the challenge of balancing meticulous care with the efficiency needed for professional results. Our resources at window Tint – AEONCUT PPF Pre-cut Cutting software are designed to help you avoid these frustrations by combining best maintenance practices with state-of-the-art pattern technology.

Experience the confidence of precise, professional tint application and maintenance when you choose AEONCUT. Our platform offers:
- Access to an extensive library of pre-cut tint and PPF patterns
- Smart software tools for unmatched accuracy and minimal waste
- Reliable support and up-to-date guidance for every project
Take the next step in elevating your skills and protecting your investment by exploring the window Tint solutions or visiting AEONCUT’s main site. Join the community of technicians and enthusiasts who trust AEONCUT to deliver lasting results. Do not let poor materials or outdated methods put your hard work at risk—upgrade now and see the difference for yourself.
Frequently Asked Questions
What is the best way to clean window tint?
To clean window tint effectively, use a specialised window tint cleaning solution applied to a soft microfibre cloth, not directly onto the window. Gently wipe the tint in horizontal strokes, starting from the top and working downwards.
Can I use regular glass cleaner on my tinted windows?
No, regular glass cleaners often contain ammonia and harsh chemicals that can damage the tint film. It’s important to use a professional-grade window tint cleaning solution specifically designed for automotive window films.
How often should I inspect my window tint for damage?
It’s advisable to inspect your window tint every three to four months. Regular checks will help you identify any potential issues, such as bubbles or peeling, before they require costly repairs or replacements.
What protective solutions can I use to extend the life of my window tint?
Use specialised protective solutions formulated for automotive window films to enhance UV protection and resist environmental contaminants. Ensure the window is clean prior to application and follow the manufacturer’s instructions for optimal results.
Recommended
- How Window Tint Works
- What is Window Tint? Essential Guide for Tinting Pros 2025
- Types of Window Tint
- Understanding Preventing Interior Fading
- 8 Rahsia Penjagaan Pintu & Tingkap Rumah Anda Supaya Tahan Lama
