Professional window tint installers know the value of precision and speed. Yet, even with steady hands and years of experience, manual cutting can still waste time and materials. Surprising as it sounds, some window tint software platforms cover templates for thousands of vehicle models and cut setup time by more than half. The real shift comes not from tools on the workbench, but from the digital systems that quietly take your workflow to a new level.
Table of Contents
- Step 1: Download And Install The Window Tint Software
- Step 2: Configure Software Settings For Your Workflow
- Step 3: Import Vehicle Patterns For Accurate Measurements
- Step 4: Customise Tint Film Options Based On Client Specifications
- Step 5: Generate Cutting Files For Precision And Efficiency
- Step 6: Validate Installation Quality Using Diagnostic Tools
Quick Summary
| Key Point | Explanation |
|---|---|
| 1. Download and setup window tint software | Ensure your computer meets system requirements and follow the installation steps outlined. |
| 2. Configure settings for optimal performance | Navigate to settings to fine-tune plotter specifications, measurements, and templates to enhance workflow efficiency. |
| 3. Import accurate vehicle patterns | Carefully select and verify vehicle templates to ensure precision in film cutting and application. |
| 4. Customize film based on client needs | Gather specific client preferences on tint characteristics and ensure compliance with legal regulations. |
| 5. Validate installation quality with diagnostics | Use built-in diagnostic tools post-installation to assess adhesion, light transmission, and overall quality. |
Step 1: Download and Install the Window Tint Software
Downloading and installing window tint software marks the critical first stage of transforming your professional installation workflow. Professional window tint installers understand that precision begins with selecting the right digital toolkit. Modern window tint software provides comprehensive template libraries, advanced cutting patterns, and seamless design integration that dramatically improve installation accuracy.
To begin your software installation journey, first verify your computer meets the necessary system requirements. Professional window tint software typically demands a Windows operating system (Windows 10 or newer), at least 4 GB of RAM, and a screen resolution of 1920×1080. Processor speed matters significantly for rendering complex vehicle templates quickly and efficiently.
Navigation to the software provider’s official website represents your next crucial step. Look for a dedicated downloads section, which often requires creating a user account or registering your professional credentials. Some window tint software providers like Vertek Films offer straightforward download processes that involve selecting your appropriate version and initiating the download.
Once downloaded, carefully follow the installation wizard’s instructions. This typically involves:
- Unzipping the downloaded file
- Running the installation executable
- Accepting the software’s terms and conditions
- Selecting your preferred installation directory
- Completing the installation process
After installation, launch the software and complete any initial setup procedures such as configuring your specific cutting plotter, calibrating measurement settings, or registering your professional licence. Most reputable window tint software platforms provide comprehensive tutorial videos or documentation to guide you through initial configuration.
Successful installation means you can now access extensive vehicle template libraries, create precise cutting patterns, and streamline your professional window tinting workflow.
The following table summarises the main tools and resources required across each step of mastering window tint software installation, highlighting their purpose and critical specifications.
| Tool/Resource | Purpose | Key Specification/Feature |
|---|---|---|
| Computer | Runs the window tint software | Windows 10+, 4 GB RAM, 1920×1080 screen |
| Window tint software | Provides templates and cutting patterns | Latest version with vehicle libraries |
| Cutting plotter | Executes precise film cutting | Compatible with software, calibrated |
| Vehicle templates | Supplies accurate cut references | Verified for make, model, year |
| Tint film materials | Used for application on vehicles | Meets client/legal requirements |
| Diagnostic tools | Validates quality of installation | Light transmission, adhesion checks |
 Verify your installation by exploring the software’s main dashboard, checking available vehicle models, and testing basic pattern generation functionalities.
Step 2: Configure Software Settings for Your Workflow
Configuring your window tint software settings represents a pivotal moment in establishing a streamlined, precise installation workflow. Professional installers understand that software configuration is not just about technical setup but about optimizing your entire operational process. Each adjustment you make can significantly impact the efficiency and accuracy of your window tinting projects.
Begin by navigating to the software’s settings or preferences menu, which typically provides comprehensive customization options. Critical configuration areas include plotter settings, measurement units, material specifications, and template preferences. Pay close attention to your specific equipment specifications, ensuring that the software recognizes your cutting plotter’s exact make and model for seamless integration.
According to FLASH configuration research, systematic configuration tuning can dramatically improve software performance. For window tint software, this means carefully calibrating measurement tolerances, setting default material thicknesses, and establishing precise cutting parameters. Professional installers should input their standard film types, noting specific characteristics like stretch tolerance, adhesive properties, and recommended cutting margins.
Personalization of your workflow involves creating custom templates and preset configurations that match your most frequent installation scenarios. This might include saving vehicle make and model templates, establishing standard cutting patterns for recurring client requests, and configuring automatic nesting algorithms to minimize material waste.
Verification of your configuration settings is crucial. Perform a test run by:
Below is a checklist table to help verify each critical component during window tint software configuration, streamlining your workflow and enhancing installation precision.
| Verification Point | Description | Completion Status |
|---|---|---|
| Plotter recognition | Ensure the software accurately detects your cutting plotter | |
| Measurement calibration | Check that units and tolerances are correctly set | |
| Material specification accuracy | Verify standard film materials are entered correctly | |
| Template alignment | Confirm vehicle templates are aligned and measured precisely | |
| Waste calculation | Test the system’s material usage and waste estimates | |
| Plotter communication test | Validate seamless communication between software and plotter | |
| Sample cut generation | Produce a test cut to confirm configuration accuracy |
- Generating a sample cut pattern for a standard vehicle template
- Checking alignment and measurement precision
- Confirming material waste calculations
- Validating plotter communication and cutting accuracy
Successful configuration means your window tint software now functions as an extension of your professional workflow. Each setting represents a carefully considered choice that enhances your installation precision, reduces material waste, and ultimately improves client satisfaction. Remember that configuration is an ongoing process continually refined through experience and technological updates.
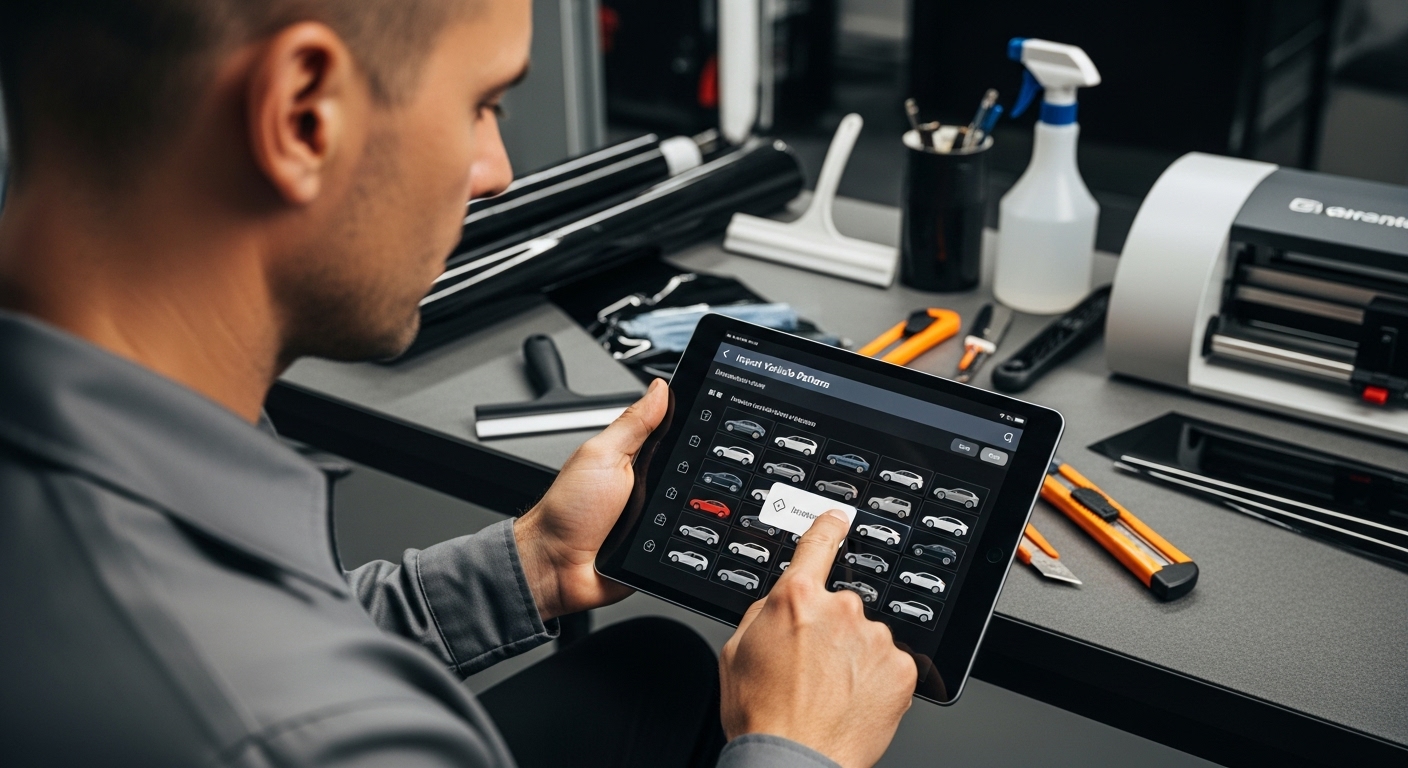
Step 3: Import Vehicle Patterns for Accurate Measurements
Importing vehicle patterns represents the precision cornerstone of professional window tint installations. Accurate digital templates transform raw software potential into exact, customized cutting solutions. Professional installers recognize that each vehicle model demands unique measurement approaches, making pattern importation a critical workflow component.
Navigation through your software’s pattern library begins by selecting specific vehicle make, model, and manufacturing year. Most advanced window tint software platforms offer extensive databases covering thousands of vehicle configurations. Carefully scroll through available options, paying meticulous attention to subtle variations that could impact film application.
According to shielding effectiveness research, precise pattern selection directly influences installation quality. Professional installers should consider not just geometric accuracy but potential material interactions specific to different vehicle models.
When importing patterns, verify compatibility by examining detailed preview screens. Look for comprehensive template views that showcase:
- Full window panel outlines
- Precise edge measurements
- Potential complex curvature details
- Recommended trimming zones
Some software platforms offer advanced pattern creation techniques for vehicles with limited or non-standard templates. These tools allow manual adjustments, ensuring even rare or modified vehicles receive professional-grade film applications.
Verification involves running a comprehensive pattern check. Zoom into critical areas, compare measurements against manufacturer specifications, and confirm alignment precision. Successful pattern importation means you can confidently proceed to material cutting, knowing your digital template represents an exact vehicle blueprint ready for seamless window tint installation.
Step 4: Customise Tint Film Options Based on Client Specifications
Customising tint film options transforms a standard installation into a personalised solution tailored precisely to client requirements. Professional window tint installers understand that each client brings unique preferences, legal restrictions, and aesthetic goals. This critical step bridges technical capability with individual client vision.
Begin by conducting a comprehensive client consultation, gathering specific details about their desired outcomes. Critical specification parameters include desired light transmission levels, heat rejection performance, colour preferences, and intended vehicle usage. Some clients prioritise privacy, while others focus on thermal comfort or maintaining a particular aesthetic appearance.
Modern window tint software provides extensive customisation tools that allow granular adjustments to film characteristics. Explore the comprehensive window tint colour options to understand the full spectrum of available selections. Professional installers should discuss potential trade-offs between visual appearance, legal compliance, and performance metrics.
Utilise your software’s advanced configuration panels to input precise client specifications. This involves selecting:
- Specific film material type
- Exact light transmission percentage
- Colour tone and reflectivity
- Infrared rejection capabilities
- Warranty considerations
Professional installers must remain cognizant of local regulations governing window tint darkness and reflectivity. According to client proxy customisation research, successful customisation requires meticulous attention to detail and clear communication.
Verification involves generating a comprehensive preview that demonstrates how the selected film will appear on the specific vehicle model. Confirm with the client that the digital representation matches their expectations before proceeding to material selection and cutting. Successful customisation means creating a window tint solution that perfectly balances technical precision with individual client preferences.
Step 5: Generate Cutting Files for Precision and Efficiency
Generating cutting files represents the critical translation point where digital design meets physical precision. Professional window tint installers understand that file generation determines the ultimate quality of film application. This step transforms carefully configured vehicle patterns into exact cutting instructions for your plotter.
Begin by reviewing all previously established parameters within your software platform. Precision cutting requires meticulous attention to material specifications, vehicle template details, and client-specific requirements. Modern window tint software platforms offer advanced nesting algorithms that optimize material usage and minimise waste.
According to ultrashort laser pulse research, cutting precision relies on exceptional digital file preparation. Professional installers should carefully examine generated cutting paths, ensuring smooth transitions and minimal material stress. Explore advanced cutting software techniques to understand the nuanced approaches available in contemporary platforms.
When generating cutting files, focus on these critical verification points:
- Confirm total material coverage
- Validate edge alignment precision
- Check for potential overlap zones
- Verify material strain distribution
- Ensure minimal waste configuration
Professional cutting file generation involves selecting appropriate file formats compatible with your specific cutting plotter. Most window tint software supports standard vector formats like DXF or AI, which preserve geometric precision across different machine platforms.
Successful file generation means producing a digital blueprint that translates seamlessly from screen to physical film. Verify by running a comprehensive preview, checking alignment markers, and confirming that every digital line represents an exact cutting instruction. The goal is a perfectly optimised cutting file that transforms your digital design into a flawless window tint installation.
Step 6: Validate Installation Quality Using Diagnostic Tools
Validating installation quality represents the ultimate professional checkpoint where precision meets performance. Window tint installers recognise that diagnostic tools transform subjective assessments into objective measurements, ensuring every installation meets rigorous industry standards. This critical step transforms your technical expertise into verifiable, client-satisfying results.
Professional diagnostic validation involves multiple comprehensive assessment techniques that go beyond visual inspection. Modern window tint software integrates advanced diagnostic capabilities allowing installers to conduct precise quality checks immediately after installation. These tools evaluate critical parameters including film adhesion, edge alignment, light transmission levels, and potential material stress points.
According to UV-visible spectroscopy research, scientific measurement techniques can definitively characterise window tint performance. Professional installers should leverage software-integrated diagnostic tools that provide quantitative data about installation quality.
When conducting diagnostic validation, focus on these essential verification points:
- Measure light transmission percentage
- Check film edge uniformity
- Evaluate adhesive consistency
- Assess material stretch and tension
- Confirm thermal rejection capabilities
Careful diagnostic validation requires systematic examination using built-in software measurement tools. Professional installers should methodically document each diagnostic result, creating a comprehensive record that demonstrates installation precision. Sophisticated window tint software platforms often provide instant graphical representations of installation quality, allowing immediate identification of potential adjustment requirements.
Successful diagnostic validation means generating a comprehensive quality report that can be shared with clients, demonstrating your professional commitment to excellence. The final validation should confirm that every installed window tint meets or exceeds original specifications, providing clients with confidence in your technical expertise and attention to detail.
Experience Unmatched Precision in Window Tint Installation
Still facing challenges with inaccurate templates or wasted materials when using window tint software? If you are looking for a solution that brings together advanced digital patterns and real-time workflow customisation, your search ends here. The insights from ‘Master Window Tint Software for Precise Installations’ make it clear: true installation excellence demands a powerful, smart platform. Now, you can put theory into practice and discover the industry leader for yourself at our window Tint solutions page.

Say goodbye to guesswork and costly errors. Visit https://aeoncutsw.com and unlock AEONCUT’s world-class capabilities—such as instant access to comprehensive vehicle libraries, cloud-driven updates for the latest patterns, and AI-powered nesting that optimises every centimetre of material. Take the decisive step towards flawless, efficient, and professional-grade results. Browse our Featured tools now and let technology elevate your entire workflow today.
Frequently Asked Questions
What are the system requirements for window tint software?
Professional window tint software typically requires a Windows operating system (Windows 10 or newer), at least 4 GB of RAM, and a screen resolution of 1920×1080.
How do I configure my window tint software for optimal performance?
Navigate to the software’s settings or preferences menu to customize areas like plotter settings, measurement units, and material specifications. Ensure the software recognises your cutting plotter’s make and model for seamless integration.
What is the process for importing vehicle patterns into window tint software?
Select the specific vehicle make, model, and manufacturing year from the software’s vehicle pattern library. Verify compatibility by checking detailed preview screens for accurate edge measurements and curvature details.
How can I validate the quality of my window tint installation?
Use diagnostic tools integrated into your window tint software to assess film adhesion, edge alignment, light transmission levels, and material stress points. Document diagnostic results to create a comprehensive quality report for your clients.
Recommended
- Cutting Tint: Master the Art of Precision Tinting Techniques – AEONCUT PPF Pre-cut Cutting software
- Master Window Tint Cutting Machine and Software for 2025 – AEONCUT PPF Pre-cut Cutting software
- Types of Window Tint: Guide for Installers and Dealers 2025 – AEONCUT PPF Pre-cut Cutting software
- Tinting Curved Windows: Pro Tips and Solutions 2025 – AEONCUT PPF Pre-cut Cutting software


