
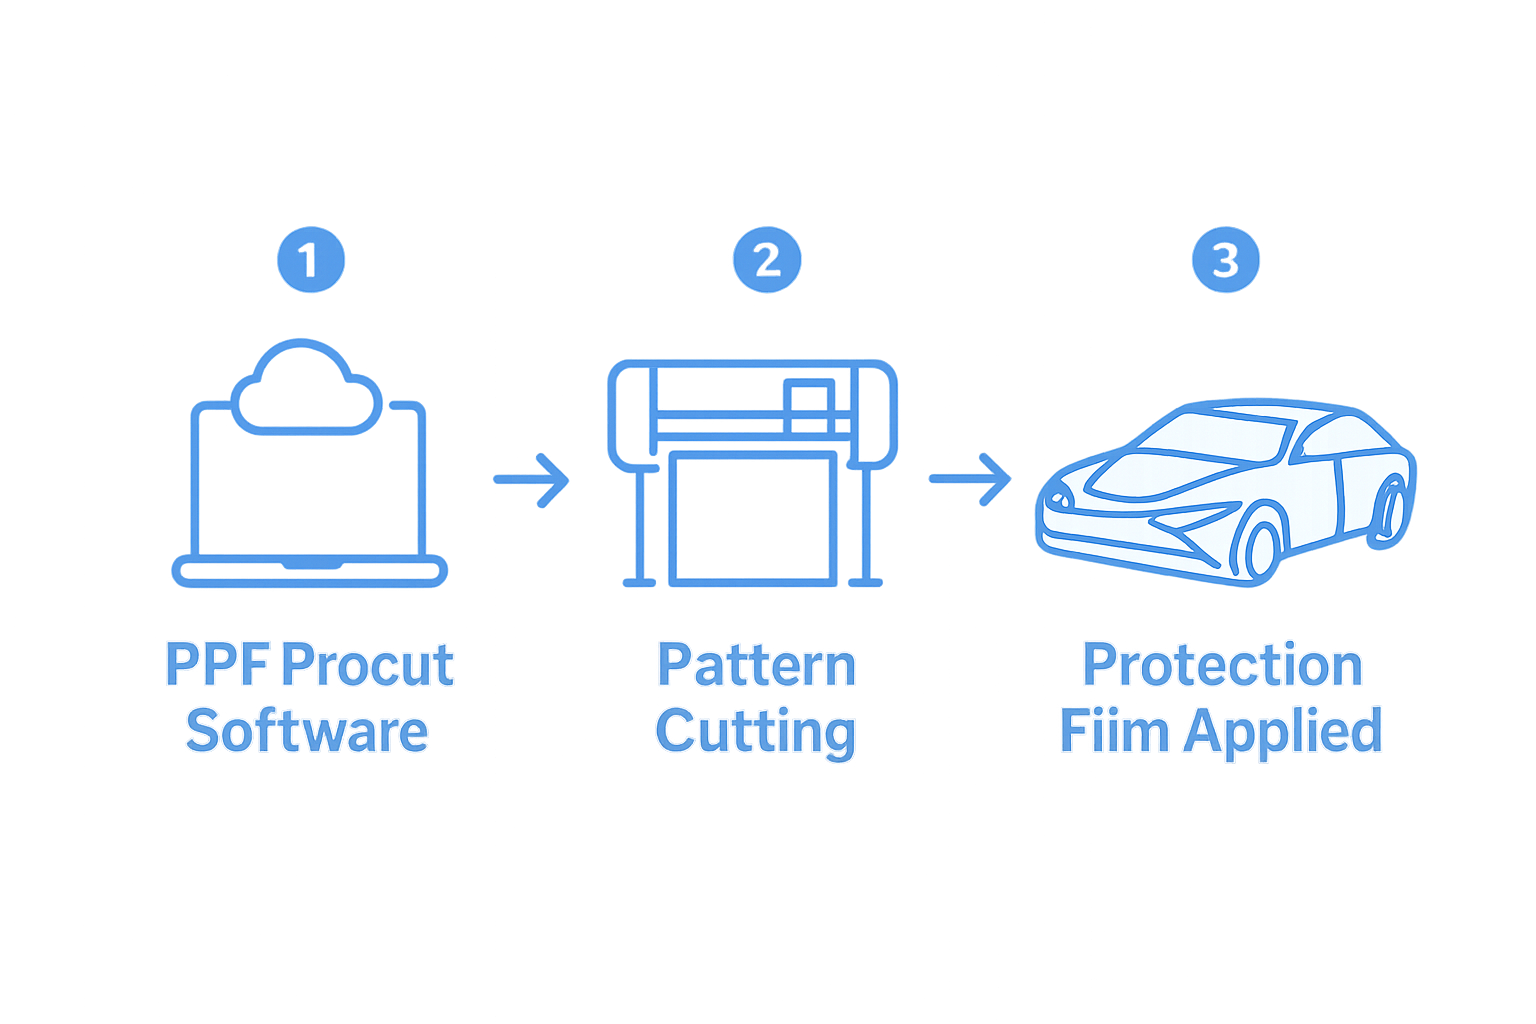
Installing PPF with precut software is the secret behind those seamless, factory-grade finishes that impress even the most discerning car enthusiasts. Pattern libraries in top-tier precut software now feature thousands of vehicle models and trims, updated across years. Most people think the hardest part is cutting the film itself, or even sticking it perfectly on a car. But the real challenge lies in the setup and digital preparation, where a single misstep in software or template selection can mean the difference between a flawless fit and endless frustration.
Table of Contents
- Step 1: Assess Your Installation Requirements
- Step 2: Select Appropriate PPF Precut Software
- Step 3: Set Up Your Software for Optimal Performance
- Step 4: Import Vehicle Templates for Cutting
- Step 5: Execute The Cutting Process With Precision
- Step 6: Verify The Final Cut And Prepare For Application
Quick Summary
| Key Point | Explanation |
|---|---|
| 1. Thoroughly assess vehicle surfaces | Inspect for imperfections that may affect film adhesion and compromise protection. |
| 2. Select compatible PPF precut software | Choose software with comprehensive vehicle pattern libraries for efficiency and accuracy during installation. |
| 3. Configure software for precise cutting | Properly calibrate settings in your software to ensure accuracy in cutting patterns and avoid errors. |
| 4. Verify accuracy of imported templates | Check vehicle templates against actual measurements to guarantee a perfect fit for each section of film. |
| 5. Conduct meticulous final cut inspection | Examine cut pieces for precision and cleanliness to ensure high-quality application results. |
Step 1: Assess Your Installation Requirements
Before diving into PPF precut software installation, thoroughly understanding your specific installation requirements sets the foundation for a successful project. Professional installers know that meticulous preparation determines the quality of the final result.
Start by comprehensively examining your vehicle’s surface and identifying the precise areas requiring paint protection film coverage. Detailed surface assessment is crucial for selecting the most appropriate PPF precut software patterns. Carefully inspect the vehicle’s panels, checking for existing paint imperfections, scratches, or irregularities that might impact film adhesion. Minor surface defects can compromise the film’s ability to bond correctly and diminish its protective capabilities.
Gather all necessary tools and equipment before beginning the installation process. Essential items typically include:
- Microfibre cleaning cloths
- Isopropyl alcohol solution
- Clay bar kit
- Surface preparation solution
- Squeegees
- Heat gun
- Precision cutting tools
Measuring your vehicle accurately becomes paramount when working with PPF precut software. Take precise measurements of each panel, understanding that even slight miscalculations can result in ill-fitting film patterns. Professional installers recommend using digital measuring tools or laser measurement devices to ensure millimetre-perfect accuracy.
Recommended measurement points include:
- Front hood dimensions
- Rear quarter panels
- Door edges
- Side mirrors
- Headlight and taillight areas
By meticulously assessing installation requirements upfront, you create a solid groundwork that significantly enhances the likelihood of achieving a flawless PPF application.
The following table summarises the essential tools and equipment required for the PPF installation process, along with their primary purposes to support a successful outcome.
| Tool/Equipment | Purpose |
|---|---|
| Microfibre cleaning cloths | Remove dirt and debris from surfaces |
| Isopropyl alcohol solution | Clean and degrease panels for better adhesion |
| Clay bar kit | Eliminate embedded contaminants |
| Surface preparation solution | Prepare panels for effective film application |
| Squeegees | Smooth film and remove air bubbles |
| Heat gun | Aid in film shaping and conforming |
| Precision cutting tools | Trim film accurately and safely |
| Digital / laser measurement devices | Ensure millimetre-precise panel measurements |
| Professional vehicle protection experts consistently emphasise that thorough preparation prevents potential complications during the actual installation process. |
Step 2: Select Appropriate PPF Precut Software
Selecting the right PPF precut software represents a critical decision that can significantly impact the efficiency and precision of your vehicle protection film installation. Compatibility and functionality are paramount when evaluating software options for your specific workflow and vehicle customisation needs.
Begin by thoroughly researching software platforms that offer comprehensive vehicle pattern libraries and advanced cutting capabilities. Professional installers understand that the most effective PPF precut software provides extensive digital pattern databases covering multiple vehicle makes, models, and years. Look for platforms that continuously update their pattern collections, ensuring you have access to the most recent vehicle specifications.
Consider the following key evaluation criteria when selecting your PPF precut software:
- Comprehensive pattern library coverage
- User interface intuitiveness
- Compatibility with your existing cutting machinery
- Cloud-based updating capabilities
- Technical support responsiveness
- Customisation options for unique vehicle modifications
Digital integration becomes increasingly important in modern automotive protection film installations. Seek software solutions that offer seamless compatibility with various cutting machines, enabling smooth file transfer and precise pattern generation. Many professional-grade platforms now provide direct machine integration, reducing manual intervention and minimising potential human error during the cutting process.
Budget considerations play a significant role in software selection. While premium solutions might represent a higher initial investment, their long-term efficiency and accuracy can generate substantial cost savings. Evaluate subscription models, feature sets, and potential return on investment carefully. Some software providers offer tiered pricing structures, allowing you to select packages that align with your business scale and specific requirements.
Explore professional PPF cutting software options that can transform your installation workflow, providing precision and efficiency previously unattainable through manual cutting techniques. Ultimately, the right PPF precut software becomes an invaluable partner in delivering exceptional vehicle protection results.
Step 3: Set Up Your Software for Optimal Performance
Configuring your PPF precut software correctly represents a pivotal moment in achieving precise and efficient vehicle protection film installations. Proper software configuration determines the accuracy and effectiveness of your entire cutting process, transforming digital patterns into perfectly tailored protective films.
Begin by establishing a robust digital workspace that ensures seamless integration between your software, cutting machine, and measurement tools. This involves carefully inputting your specific cutting machine specifications, calibrating digital measurements, and configuring system preferences that align with your particular workflow. Professional installers understand that even minor miscalibrations can lead to significant cutting inaccuracies.
Key configuration parameters require meticulous attention:
- Machine cutting head specifications
- Material thickness settings
- Blade pressure calibration
- Digital measurement units
- File export configurations
- Network and cloud synchronisation options
Verify your software’s compatibility with existing cutting hardware by conducting comprehensive system compatibility tests. Modern PPF precut software platforms often provide detailed configuration wizards that guide users through intricate setup processes. Pay special attention to material-specific settings, ensuring your software can accommodate various film thicknesses and material types used in vehicle protection applications.
Cloud-based synchronisation represents a significant advancement in PPF precut software functionality. Implement robust network configurations that enable seamless pattern updates, ensure secure data transfer, and facilitate real-time collaboration across different installation workstations. Professional installers leverage these technological capabilities to maintain consistent quality and efficiency across multiple projects.
Establish a systematic approach to software updates and pattern library management. Regular software updates ensure access to the latest vehicle model patterns, improved cutting algorithms, and enhanced machine compatibility. Create a routine that involves periodic software checks, pattern library refreshes, and system performance evaluations.
Discover advanced PPF software configuration techniques that can elevate your installation precision. Remember that thorough software setup is not a one-time task but an ongoing process of refinement and optimisation.
Step 4: Import Vehicle Templates for Cutting
Importing vehicle templates represents a critical precision point in the PPF precut software workflow, transforming digital design into actionable cutting instructions. Accurate template selection determines the quality of your film application, making this step fundamental to achieving professional-grade results.
Navigation through your software’s template library requires methodical attention to detail. Begin by precisely identifying your specific vehicle make, model, and year, understanding that even slight variations can dramatically impact template accuracy. Professional installers recognise that comprehensive pattern libraries offer the most extensive coverage, enabling precise matching for diverse vehicle configurations.
Consider these essential template selection criteria:
- Exact vehicle model year
- Specific trim level details
- Potential aftermarket modifications
- Regional vehicle specification variations
- Precise panel configuration
- Potential custom bodywork adjustments
Carefully examine each imported template, verifying dimensional accuracy against your vehicle’s actual measurements. Modern PPF precut software platforms frequently provide visual overlay tools that allow side-by-side comparisons between digital templates and actual vehicle surfaces. Leverage these digital verification mechanisms to confirm template precision before initiating the cutting process.
Digital file management becomes crucial when handling multiple vehicle templates. Develop a systematic approach to organizing, storing, and accessing your template library. Many professional-grade software solutions offer cloud-based storage and synchronisation, enabling seamless template retrieval across multiple workstations and ensuring consistent access to the most updated patterns.
Pay close attention to file compatibility and format requirements during template importation. Different cutting machines may have specific file type preferences, so confirm that your selected templates align with your hardware’s specifications. Some advanced PPF precut software platforms automatically convert file formats, streamlining the importation process and reducing potential compatibility issues.
Explore advanced vehicle template management strategies that can elevate your installation precision. Remember that template selection is not merely a technical task but an art form requiring meticulous attention to vehicular design nuances.
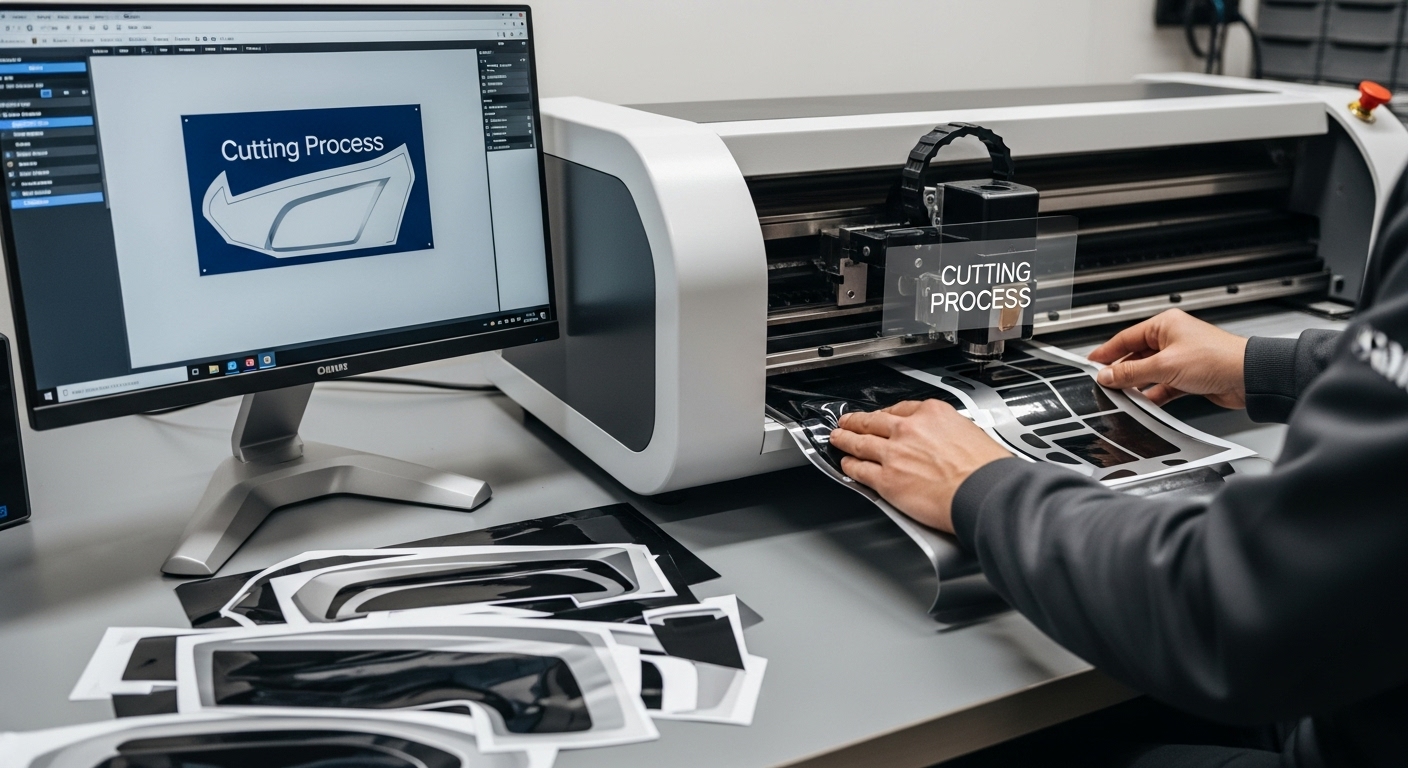
Step 5: Execute the Cutting Process with Precision
The cutting process represents the pinnacle of PPF installation precision, where digital designs transform into perfectly tailored protective films. Meticulous execution determines the quality of your final product, requiring a combination of technological sophistication and skilled craftsmanship.
Begin by preparing your cutting surface with exceptional attention to cleanliness and flatness. Professional installers understand that even microscopic debris can compromise cutting accuracy. Ensure your work surface is completely clean, smooth, and free from potential contaminants that might interfere with the cutting machinery’s performance.
Key considerations during the cutting process include:
- Material alignment precision
- Blade sharpness verification
- Cutting pressure calibration
- Temperature and humidity control
- Material tension management
- Cutting speed optimization
Carefully load your selected paint protection film into the cutting machine, paying extraordinary attention to material orientation and tension. Proper film positioning is critical for achieving seamless, edge-to-edge coverage. Modern PPF precut software provides advanced alignment guides and digital overlay tools that help ensure millimetre-perfect placement before initiating the cutting sequence.
Monitor the cutting process closely, watching for any potential anomalies or unexpected material behaviour. Professional-grade cutting machines offer real-time performance tracking, enabling immediate adjustments if slight deviations occur. Some advanced systems incorporate automatic error detection mechanisms that can pause or adjust cutting parameters to maintain optimal precision.
After completing the cutting process, conduct a comprehensive visual inspection of the produced film pieces. Look for clean, sharp edges, consistent pattern matching, and any potential imperfections that might compromise the installation quality. Verify that each cut piece precisely matches the digital template, checking dimensional accuracy across multiple reference points.
Discover advanced cutting techniques for professional PPF installers that can elevate your installation precision. Remember that mastering the cutting process is both a technological and artistic endeavour, requiring continuous learning and refinement.
Step 6: Verify the Final Cut and Prepare for Application
Verification of the final cut represents a critical quality control stage in the PPF installation process, where precision transforms from digital design to tangible protection film. Meticulous inspection ensures the integrity of your protective film before actual vehicle application, preventing potential installation complications.
Begin by creating a systematic verification workflow that thoroughly examines each cut piece under optimal lighting conditions. Professional installers understand that natural daylight or high-quality LED lighting provides the most accurate visual assessment, revealing subtle imperfections that might be missed under standard workshop illumination.
Critical verification parameters include:
- Edge sharpness and clean cutting
- Dimensional accuracy
- Pattern consistency
- Material integrity
- Absence of micro-tears
- Precise template matching
Careful material weeding becomes an art form in professional PPF installation. Gently remove excess film using precision tweezers or weeding tools, maintaining consistent tension to prevent inadvertent stretching or distortion. Professional installers develop a delicate touch that allows smooth material separation without compromising the film’s structural integrity.
Utilise your PPF precut software’s digital overlay capabilities to conduct a final digital verification. Many advanced platforms offer comparative analysis tools that allow side-by-side digital and physical template matching, providing an additional layer of quality assurance beyond visual inspection.
Prepare your cut pieces for application by creating a systematic organisation method. Arrange film sections in the order of intended installation, labelling each piece with its corresponding vehicle panel. This approach minimises confusion during the actual application process and ensures a smooth, efficient workflow.
Implement a rigorous cleaning protocol for both the cut film and preparation workspace.
Below is a checklist table outlining the key verification steps to take after cutting the PPF film, helping ensure each piece is ready for seamless application.
| Verification Step | What to Look For |
|---|---|
| Edge sharpness | Clean, crisp cuts without jagged edges |
| Dimensional accuracy | Matches actual panel measurements |
| Pattern consistency | Uniformity across all cut pieces |
| Material integrity | No tears, stretches or deformities |
| Absence of micro-tears | Smooth, undamaged film surfaces |
| Template matching | Correctly aligns with intended panels |
| Clean working environment | Dust-free area and uncontaminated film |
| Use lint-free cloths and isopropyl alcohol to remove any potential contaminants from the film’s surface, ensuring optimal adhesion during the subsequent installation stage. Cleanliness is paramount in achieving a flawless PPF application. |
Learn advanced film verification techniques for professional installers that can elevate your installation precision. Remember that this verification stage represents the final checkpoint between digital design and exceptional vehicle protection.
Upgrade Your PPF Installation Precision with AEONCUT
Are you tired of struggling with inaccurate patterns or frustrating material waste when installing paint protection film? You have just learned the essential steps to assess requirements, select the right software and execute with precision, but traditional methods rarely meet the high standard demanded by both professionals and car enthusiasts. Unlock the true potential of PPF software by discovering AEONCUT’s innovative solutions designed to address every challenge mentioned in your installation process. Gain access to an extensive pattern library, advanced digital measurement tools and smart AI-driven features for unmatched accuracy.

Why wait and risk another imperfect install? Experience real efficiency now with AEONCUT’s paint protection film solutions and explore subscription plans tailored to your needs. Visit AEONCUT today and transform every PPF project into flawless results.
Frequently Asked Questions
What is PPF precut software?
PPF precut software is a specialised program designed to create digital patterns for cutting paint protection film that fits specific vehicle makes and models.
How does PPF precut software improve installation accuracy?
The software allows for precise measurements and detailed templates that ensure the film fits perfectly on the vehicle, reducing the risk of errors during installation.
What tools are necessary for using PPF precut software?
Essential tools include a precision cutting machine, cleaning supplies, and software-compatible measuring devices to ensure accurate pattern application.
How do I ensure my PPF precut software is correctly set up?
You should configure your software by inputting machine specifications, calibrating digital measurements, and regularly updating your pattern library to optimise performance.
Recommended
- PPF Cutting Software: Essential Guide for Installers 2025 – AEONCUT PPF Pre-cut Cutting software
- Best PPF Software 2025: Top Picks for Auto detailing businesses – AEONCUT PPF Pre-cut Cutting software
- How PPF Precut Software Transforms the Paint Protection Industry – The Power of Aeoncut – AEONCUT PPF Pre-cut Cutting software
- How to Create Custom PPF Patterns Using Aeoncut: Step-by-Step Guide – AEONCUT PPF Pre-cut Cutting software

