Most british automotive professionals know that the right tools make all the difference in paint protection film installation. With precision at stake, even a slight measurement error can lead to costly waste or visible flaws. Investing in cutting-edge measuring devices and smart software means every cut and placement is intentional. This guide breaks down professional strategies that help you achieve immaculate results and gain the trust of discerning british car owners.
Table of Contents
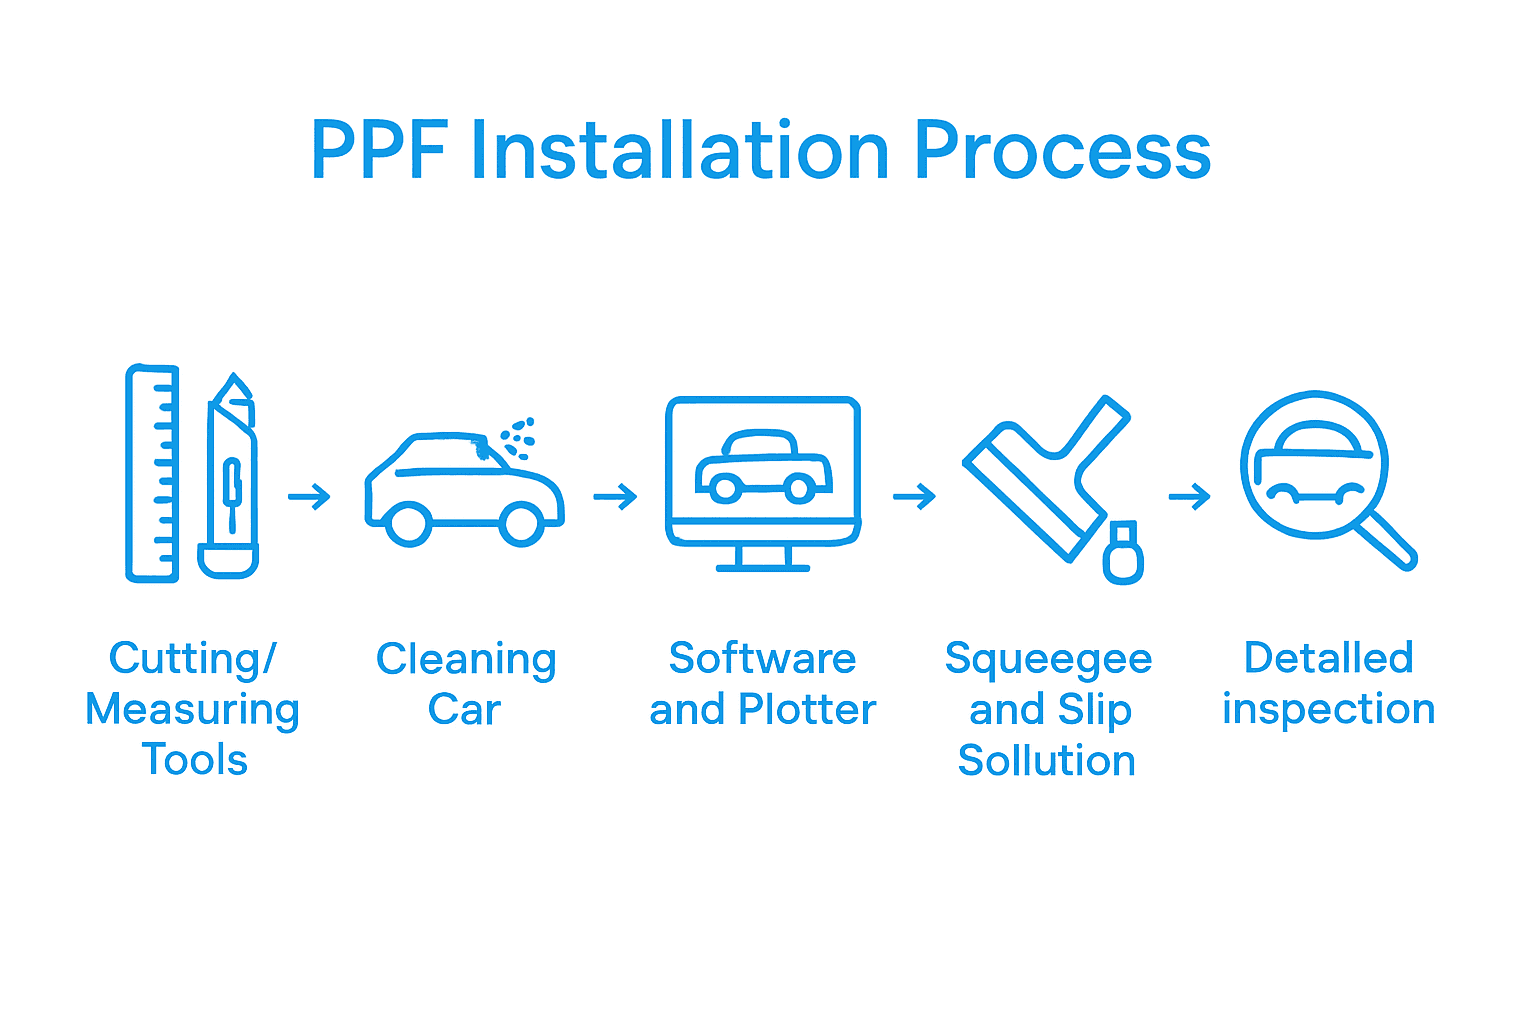
- Step 1: Select Appropriate Cutting and Measuring Tools
- Step 2: Prepare Installation Area and Surface
- Step 3: Utilise Professional PPF Software for Precision
- Step 4: Apply Film Using Key Squeegees and Slip Solutions
- Step 5: Inspect and Perfect Film Placement and Edges
Quick Summary
| Key Point | Explanation |
|---|---|
| 1. Invest in Professional Tools | Use precise cutting and measuring tools for flawless PPF installations. Digital cutters and measuring tools enhance accuracy and efficiency. |
| 2. Ensure a Clean Installation Area | Maintain a dust-free environment and temperature control for optimal PPF adhesion. Complete surface cleaning is critical before application. |
| 3. Utilise Advanced Software | Rely on professional cutting software to create accurate templates specific to vehicle models, minimising waste and ensuring perfect fit. |
| 4. Select Appropriate Squeegees | Choose suitable squeegees for varying panel shapes, ensuring effective water removal while preventing film damage during application. |
| 5. Conduct Thorough Final Inspection | Inspect the installation under different lighting to identify imperfections and ensure seamless integration of the PPF with vehicle panels. |
Step 1: Select Appropriate Cutting and Measuring Tools
Mastering PPF installation requires precision cutting and measuring equipment that delivers professional-grade results. Selecting the right tools transforms an average installation into a flawless finish that showcases your expertise and attention to detail.
Professional installers recognise that top PPF cutting software solutions dramatically improve workflow efficiency. Your cutting toolkit should include digital cutters, precision measuring tape, sharp utility knives with replaceable blades, and robust cutting mats designed specifically for vehicle wrap materials. Look for tools with laser-guided measurement features and digital template compatibility to ensure accurate pattern translation from software to vehicle surface.
Measurement accuracy determines installation quality. Invest in professional-grade digital measuring tools with 0.1mm precision. Key tools include digital callipers, retractable measuring tapes with metal reinforced edges, and surface contour measurement devices that map vehicle panel geometries. These instruments help you create templates matching vehicle specifications exactly.
Professional tip: Always calibrate your digital measuring tools before each installation project and maintain them regularly to preserve measurement precision.
Here is a summary table highlighting the main benefits of using professional-grade tools and software in PPF installation:
| Tool/Software Type | Core Benefit | Professional Advantage |
|---|---|---|
| Digital cutters | Ensures precise, clean film edges | Faster, more consistent workflow |
| Digital measuring tools | Delivers 0.1mm accuracy | Minimises fitment errors |
| Advanced PPF cutting software | Offers exact digital templates | Saves material, reduces pattern wastage |
| Surface contour measurement devices | Matches film to complex panel curves | Enhances adherence, tighter fit |
| Vehicle model databases (in software) | Speeds up template selection | Supports a wider range of vehicles |
Step 2: Prepare Installation Area and Surface
Successful paint protection film (PPF) installation demands meticulous surface preparation that creates an optimal environment for a flawless application. Your workspace and vehicle surface are foundational to achieving professional results.
Begin by selecting a clean, controlled environment. Professional vehicle preparation guidelines recommend maintaining temperatures between 18°C and 32°C with minimal dust. Clean the vehicle thoroughly using a degreasing soap specifically designed for automotive surfaces. Remove all contaminants through a comprehensive multi-step cleaning process that includes washing, clay bar treatment, and final surface decontamination.
Immediate pre-installation surface preparation is critical. Wipe down the entire surface with 99% isopropyl alcohol using lint-free microfibre towels to eliminate any remaining oils, dust, or microscopic particles. This final cleaning step ensures maximum adhesion and prevents potential imperfections underneath the protective film. Work methodically panel by panel, ensuring complete surface cleanliness before film application.
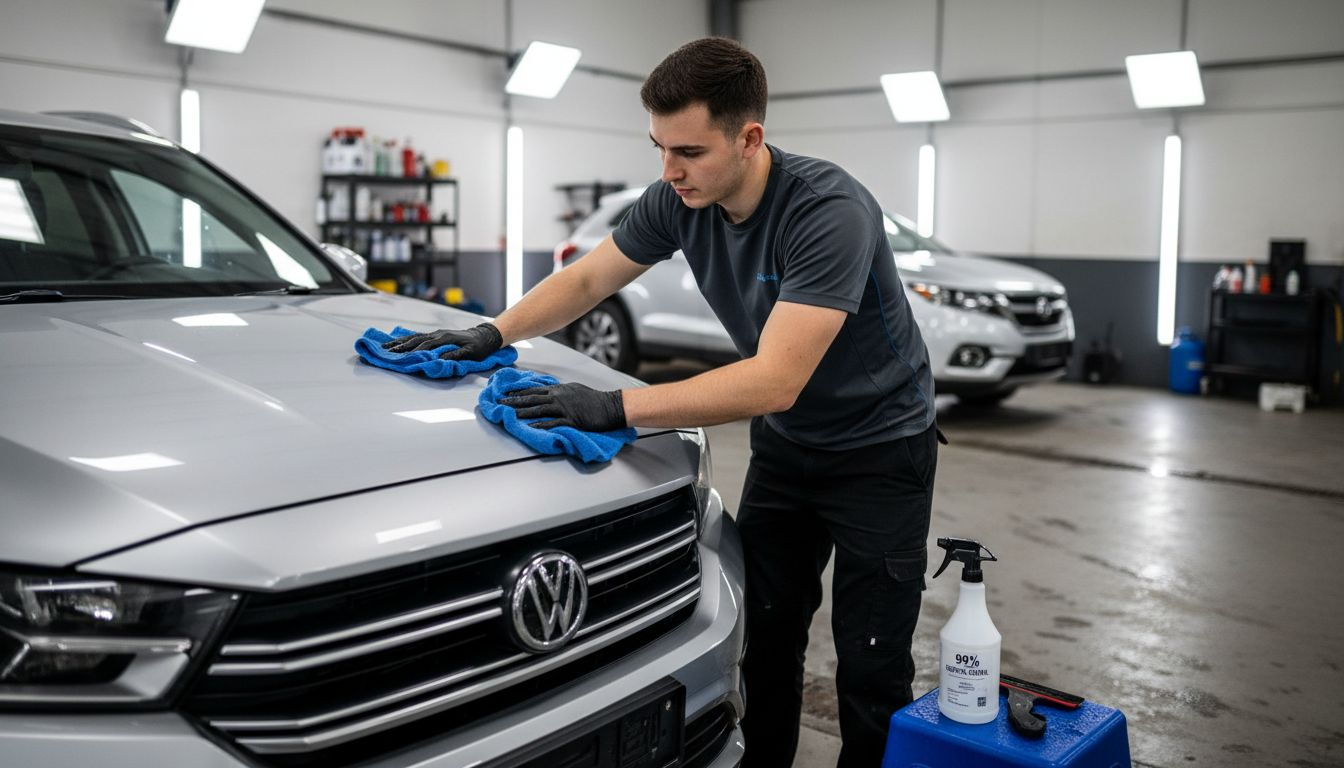
Professional tip: Invest in high-quality microfibre towels and change them frequently during the cleaning process to prevent reintroducing contaminants onto the vehicle surface.
Step 3: Utilise Professional PPF Software for Precision
Professional paint protection film installation requires precision cutting and advanced technological support to achieve impeccable results. Leveraging sophisticated software transforms your installation process from manual labour to high-precision craftsmanship.
Professional installers increasingly rely on computer-guided vinyl cutters that integrate advanced pattern recognition and cutting technologies. Comprehensive PPF software solutions like professional cutting platforms enable precise digital template generation specific to individual vehicle models. These systems analyse vehicle panel geometries, create exact digital templates, and optimise material usage by minimising waste through intelligent nesting algorithms.
Master the software interface by understanding its key features: vehicle make and model database, digital template customisation, pattern scaling, and material optimisation tools. Practice creating digital templates for different vehicle types, learning to adjust for subtle panel variations. Always perform test cuts on sample materials to validate your digital template precision before applying to the actual vehicle surface.
Professional tip: Update your software regularly to access the latest vehicle model templates and cutting technology improvements.
Step 4: Apply Film Using Key Squeegees and Slip Solutions
Successful paint protection film application requires precision technique and professional-grade tools that transform complex installation into a seamless process. Your squeegee selection and slip solution preparation are fundamental to achieving a flawless finish.
Professional PPF installers recommend specific squeegee types like the Yellow or Green Turbo and a dedicated PU Squeegee for optimal film application. Select a range of squeegee sizes to accommodate different panel shapes and curves. The 12-inch One Pass Squeegee works exceptionally well for removing water and soap residue during initial surface preparation. Choose squeegees with soft edges to prevent film scratching and maintain consistent pressure during application.
Prepare your slip solution carefully by mixing distilled water with a specialised PPF application solution. The correct solution ratio ensures smooth film placement and minimises air bubble formation. Begin application from the centre of the panel, using overlapping squeegee strokes to push out air and water. Work methodically across the surface, maintaining consistent pressure and angle to ensure perfect adhesion and minimal surface tension.
Professional tip: Always keep your squeegee edges clean and replace them immediately if you notice any nicks or rough surfaces that could damage the film during installation.
The following table compares essential PPF squeegee types and their ideal application scenarios:
| Squeegee Type | Best Use Case | Key Characteristic |
|---|---|---|
| Yellow/Green Turbo | Large flat panels, initial application | Soft edges, minimises scratching |
| PU (polyurethane) Squeegee | Complex curves and contours | Flexibility, conforms to shapes |
| 12-inch One Pass | Water and soap removal during prep | Broad coverage, efficient drying |
Step 5: Inspect and Perfect Film Placement and Edges
The final stage of PPF installation demands meticulous attention to detail that transforms a good application into a professional masterpiece. Your goal is achieving seamless film integration that appears factory perfect.
Premium PPF installations involve strategically removing vehicle components to ensure film wraps around edges with near invisible precision. Carefully remove taillamps and door handles to create uninterrupted film coverage across complex panel geometry. Use precision heat guns to gently stretch film around curved surfaces and complex panel transitions. Work slowly and methodically checking for potential air bubbles or edge lifting which could compromise the installation quality.
Conduct a comprehensive final inspection under different lighting conditions. Look for subtle imperfections like edge adhesion inconsistencies microscopically smooth surface integration and uniform film tension across all vehicle panels. Use a combination of oblique lighting and close visual examination to identify any minute installation irregularities. Pay special attention to panel gaps panel edges and regions with complex geometric shapes that demand exceptional technique.
Professional tip: Perform your final inspection using both natural daylight and artificial overhead lighting to reveal any potential film placement imperfections that might be invisible under single light conditions.
Enhance Your PPF Installation Precision with AEONCUT Cutting Software
Achieving flawless paint protection film installation requires exact cutting, precise measurements and flawless pattern execution. The challenges highlighted in the article, such as minimising fitment errors and optimising material usage, are where AEONCUT’s advanced PPF software – AEONCUT PPF Pre-cut Cutting software truly excels. By leveraging a comprehensive vehicle model database, AI-driven auto-nesting and detailed digital templates, installers can save time, reduce waste and deliver professional-grade results every time.

Experience the confidence of seamless film application supported by industry-leading technology. Join professional installers and serious car enthusiasts who trust AEONCUT’s solutions for high-precision pattern cutting. Start improving your workflow today by exploring our extensive PPF precut pattern – AEONCUT PPF Pre-cut Cutting software and expert resources on Paint Protection Film – AEONCUT PPF Pre-cut Cutting software. Visit https://aeoncutsw.com now and unlock the next level of PPF craftsmanship.
Frequently Asked Questions
What tools are essential for achieving flawless PPF installation?
To achieve flawless Paint Protection Film (PPF) installation, you need essential tools like digital cutters, precision measuring tape, sharp utility knives with replaceable blades, and professional-grade digital measuring tools. Invest in these tools to enhance accuracy and efficiency in your installation process.
How do I ensure accurate measurements during PPF installation?
Accurate measurements are crucial for a successful PPF installation. Use professional-grade digital measuring tools with a precision of 0.1mm, and calibrate them before each project to ensure that your templates match the vehicle specifications exactly.
What steps should I take to prepare the installation surface for PPF?
Prepare the surface by selecting a clean, controlled environment, washing the vehicle thoroughly, and then using 99% isopropyl alcohol with lint-free microfibre towels for a final wipe down. This meticulous cleaning process maximises adhesion by eliminating all contaminants before applying the film.
How can I effectively apply PPF to complex panel shapes?
To apply PPF effectively to complex panel shapes, use soft-edged squeegees and a carefully prepared slip solution. Begin by applying the film from the centre of the panel and use overlapping strokes to push out air and water, ensuring a smooth adhesion across the surface.
What should I do during the final inspection of the PPF installation?
During the final inspection, examine the installation under various lighting conditions to identify any imperfections such as edge adhesion issues or air bubbles. Conduct a thorough check of all panel gaps and edges, addressing any irregularities before concluding the installation process.
How can professional-grade tools improve my PPF installation efficiency?
Professional-grade tools enhance installation efficiency by ensuring precision cuts, accurate measurements, and optimal adhesion. By incorporating these tools, you can significantly reduce material waste and expedite your workflow, achieving higher-quality results in less time.
Recommended
- Common Mistakes in PPF Installation and How to Avoid Them – AEONCUT PPF Pre-cut Cutting software
- Common Mistakes in PPF Installation and How to Avoid Them – AEONCUT PPF Pre-cut Cutting software
- How to Create Custom PPF Patterns Using Aeoncut: Step-by-Step Guide – AEONCUT PPF Pre-cut Cutting software
- How to Create Custom PPF Patterns Using Aeoncut: Step-by-Step Guide – AEONCUT PPF Pre-cut Cutting software
- How to Improve Workshop Efficiency for Diesel Injection Pros 2025 – My WordPress


