Getting a flawless finish with ppf precut may seem simple, especially with all the latest high-tech tools and software. Yet even the tiniest speck of dust can ruin an entire installation, and temperature shifts of just a few degrees are enough to cause film shrinkage or lifting. Most people focus on the film itself and forget about one hidden factor: the environment. Perfect results rarely come from fancy gear alone, but from meticulous workspace preparation and careful attention to the invisible details other installers overlook.
Table of Contents
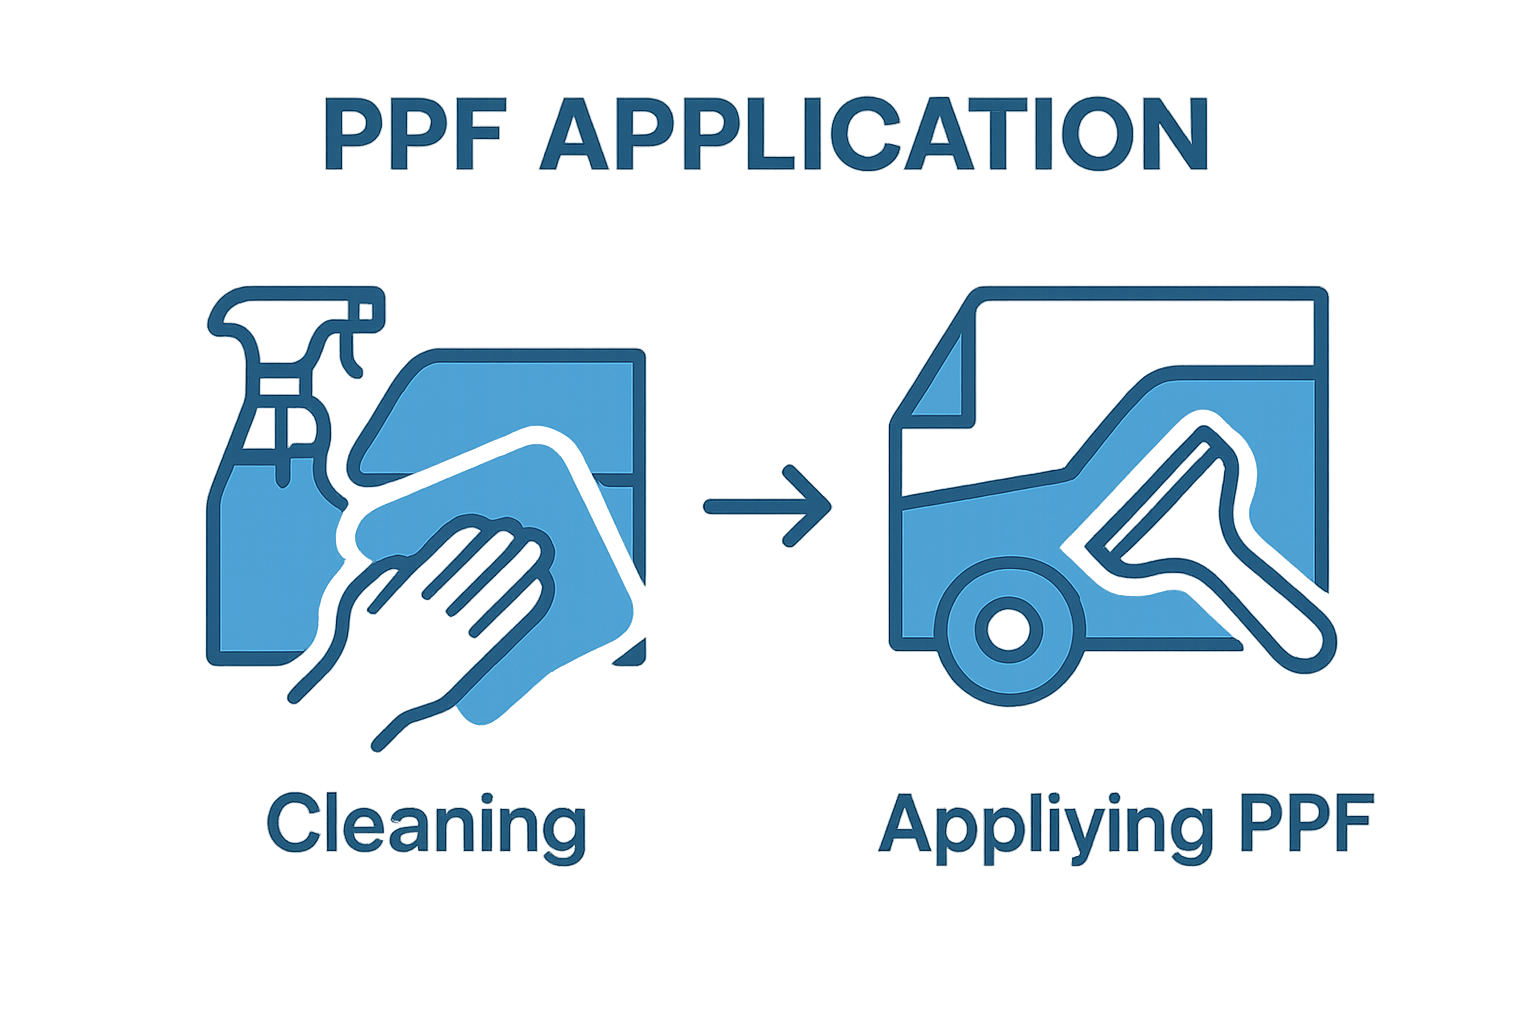
- Step 1: Prepare Your Workspace for PPF Installation
- Step 2: Measure and Cut PPF Precut to Fit Your Vehicle
- Step 3: Clean the Surface Thoroughly Before Application
- Step 4: Apply Precut PPF with Precision and Care
- Step 5: Check for Bubbles and Imperfections Post-Application
- Step 6: Finalise and Protect the PPF Installed Area
Quick Summary
| Key Point | Explanation |
|---|---|
| 1. Prepare a Clean Workspace | Create a dust-free environment with controlled temperature and humidity to enhance PPF film adhesion. |
| 2. Measure Accurately for Best Fit | Use digital tools to ensure precise measurements, including panel dimensions and complexities, for optimal coverage. |
| 3. Thoroughly Clean Vehicle Surface | Eliminate all contaminants using clay bars and isopropyl alcohol to ensure strong film adhesion and durability. |
| 4. Apply Using a Slip Solution | Employ distilled water mixed with automotive soap to facilitate accurate positioning of PPF during application. |
| 5. Inspect for Bubbles Post-Application | After installation, check for air bubbles and imperfections, allowing gentle heat to resolve smaller trapped air issues. |
Step 1: Prepare Your Workspace for PPF Installation
Effective PPF installation begins with creating an optimal workspace that minimises potential contamination and supports precise application. Professional installers understand that the environment plays a critical role in achieving flawless results with ppf precut materials.
Carefully selecting and preparing your installation area requires strategic attention to multiple factors. Start by identifying a clean, enclosed space with minimal air movement and dust circulation. Ideal locations include dedicated vehicle wrap rooms, detailing bays, or professionally maintained workshop areas with controlled environmental conditions. The workspace should have smooth, cleanable surfaces and sufficient lighting to inspect every detail during installation.
Temperature and humidity control are paramount when working with ppf precut films. Maintain room temperatures between 20 to 25 degrees Celsius with humidity levels around 50%. These controlled conditions ensure optimal film adhesion and prevent potential stretching or shrinkage during application. Consider using portable air conditioning or dehumidification equipment to stabilise the environment if your standard workspace fluctuates.
Prepare your workspace by thoroughly cleaning all surfaces using isopropyl alcohol and lint-free microfibre cloths. Remove any potential contaminants like dust, grease, or residual cleaning chemicals that could compromise film adhesion. Learn more about avoiding common installation mistakes by understanding how environmental factors impact PPF performance.
Essential tools for workspace preparation include:
- High-quality microfibre cloths
- 70% isopropyl alcohol solution
- Lint-free cleaning wipes
- Clean, non-shedding work gloves
- Dust extraction or air purification system
Before beginning installation, conduct a final workspace inspection. Verify surfaces are immaculately clean, lighting is adequate, and all necessary tools are within reach. A meticulously prepared workspace significantly increases the likelihood of achieving professional-grade PPF installation results.
Below is a table summarising the essential tools and their purposes for preparing your workspace for PPF installation, ensuring nothing is overlooked at this critical stage.
| Tool/Material | Specification/Type | Purpose |
|---|---|---|
| High-quality microfibre cloths | Lint-free, non-shedding | Cleaning surfaces and preventing contamination |
| 70% isopropyl alcohol solution | Automotive grade | Removing grease and residual chemicals |
| Lint-free cleaning wipes | Disposable or reusable | Ensuring streak-free surface preparation |
| Clean, non-shedding work gloves | Fabric or nitrile | Avoiding fingerprints and direct contact |
| Dust extraction/air purification | HEPA-filtered, portable | Reducing airborne particles in the workspace |
Step 2: Measure and Cut PPF Precut to Fit Your Vehicle
Measuring and cutting ppf precut materials requires precision and methodical preparation to ensure a perfect vehicle coverage. Professional installers understand that accurate measurements form the foundation of exceptional paint protection film application.
Begin by thoroughly cleaning the vehicle surface and ensuring it is completely dry. Use digital measuring tools or laser measurement devices for maximum accuracy. Digital calipers and professional measuring tapes provide the most reliable measurements for ppf precut installations. Focus on capturing exact panel dimensions, paying particular attention to curves, edges, and complex contours that might affect film placement.
Explore advanced pattern creation techniques to understand how professional software can streamline your measurement process. Modern cutting software eliminates manual measurement errors by generating precise digital templates tailored to specific vehicle models.
When working with ppf precut materials, always allow slight overlap margins to accommodate potential minor variations during installation. Typically, an additional 5-10 millimetres around panel edges provides sufficient flexibility for seamless application. Carefully inspect the precut film against your measurements, verifying alignment and coverage before final positioning.
Critical tools for measurement and cutting include:
- Digital laser measuring device
- Professional digital calipers
- High-quality cutting mat
- Sharp ceramic cutting blade
- Precision edge ruler
Verify your measurements by creating a test fit of the ppf precut film. Check for precise alignment, smooth edges, and consistent coverage across vehicle panels. Any discrepancies should be addressed before final installation to guarantee a professional finish.
The following table lists essential tools required for each main step of the PPF precut installation process, helping ensure you have all necessary equipment readily at hand.
| Installation Step | Essential Tools |
|---|---|
| Workspace Preparation | Microfibre cloths, isopropyl alcohol, air purification system |
| Measuring & Cutting | Digital calipers, laser measuring device, cutting mat, blade |
| Surface Cleaning | Automotive clay bar, microfibre towels, pH-neutral shampoo |
| PPF Application | Slip solution, squeegees, microfibre towels, heat gun |
| Inspection & Finalisation | LED inspection light, magnifying glass, ceramic coating applicator |
Step 3: Clean the Surface Thoroughly Before Application
Preparing the vehicle surface represents a critical phase in ppf precut installation where meticulous cleaning determines the long-term adhesion and performance of your protective film. Professional installers recognize that surface contamination can compromise entire installation quality, making thorough cleaning an absolute necessity.
Initiate the cleaning process by performing a comprehensive initial wash using automotive-specific cleaning solutions designed to remove surface contaminants. Use pH-neutral car shampoo and microfibre wash mitts to gently eliminate dirt, road grime, and environmental pollutants. After the initial wash, focus on deep decontamination using clay bar treatments to remove embedded particulates like industrial fallout, tree sap, and mineral deposits that standard washing cannot eliminate.
Discover professional interior and exterior cleaning techniques to enhance your preparation methodology. Following clay bar treatment, transition to chemical decontamination using isopropyl alcohol solutions specifically formulated for automotive surface preparation. These solutions effectively remove remaining oils, waxes, and residual cleaning agents that might prevent ppf precut film adhesion.
Carry out a systematic cleaning approach targeting each vehicle panel individually. Use lint-free microfibre towels and work in controlled, consistent motions to avoid introducing new contaminants. Maintain a clean working environment by frequently changing towels and using dedicated cleaning cloths for different stages of surface preparation.
Essential cleaning tools for ppf precut installation include:
- High-quality automotive clay bar kit
- 70% isopropyl alcohol solution
- Lint-free microfibre towels
- pH-neutral car shampoo
- Detailing spray for final surface inspection
Verify surface cleanliness by performing a final white towel test. Wipe the prepared surface with a clean white microfibre towel. Any discoloration indicates remaining contaminants requiring additional cleaning. A perfectly clean surface will result in a pristine white towel after wiping, signaling readiness for ppf precut film application.
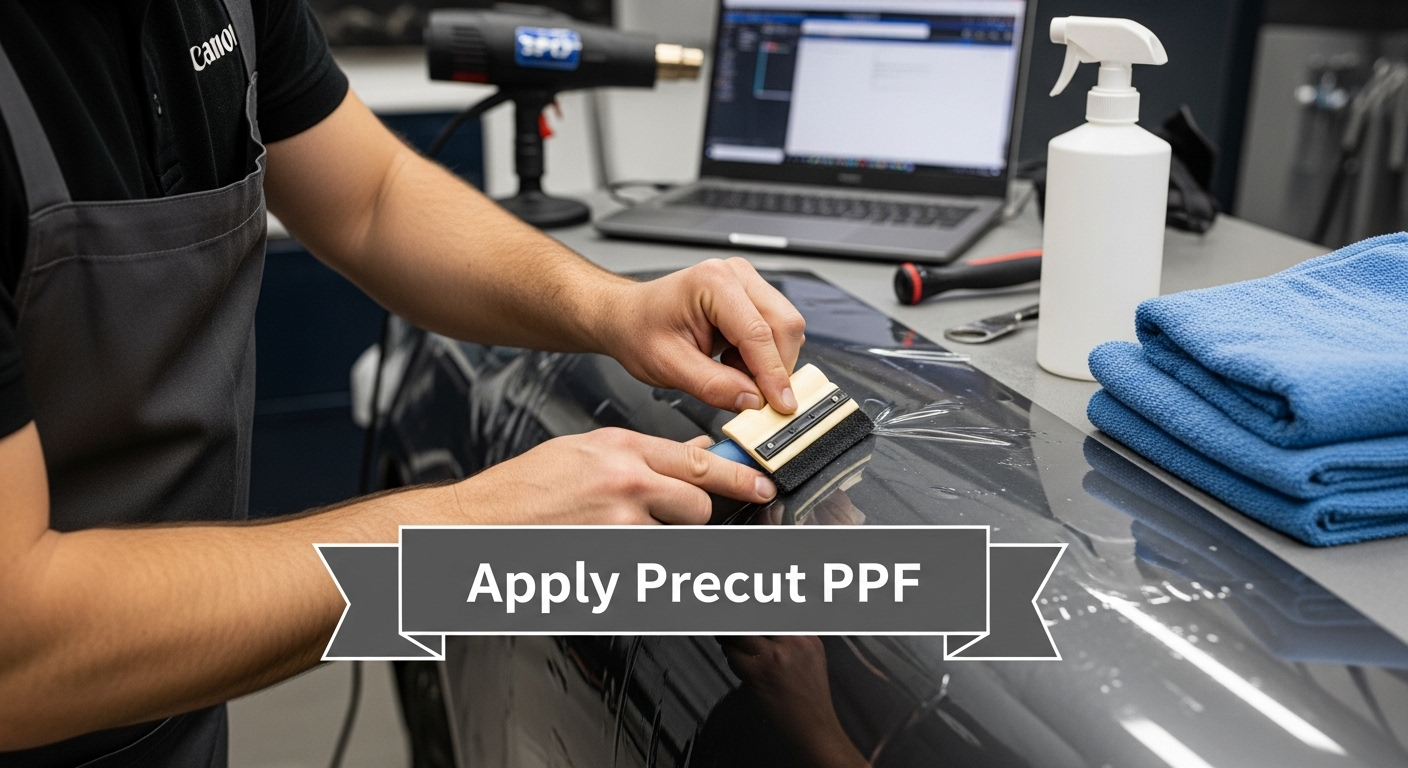
Step 4: Apply Precut PPF with Precision and Care
Applying ppf precut materials demands exceptional skill, patience, and a methodical approach that transforms automotive surface protection into a precise art form. Professional installers understand that every millimetre matters during the application process, with success determined by meticulous technique and unwavering attention to detail.
Begin the application by preparing a slip solution comprising distilled water and a few drops of automotive application soap. This solution enables smooth film positioning and minimises potential surface tension complications. Generously spray the prepared vehicle surface and the adhesive side of the ppf precut film, creating a lubricating layer that allows precise alignment and repositioning during initial placement.
Explore advanced custom pattern creation techniques to understand how professional software can enhance your installation precision. Carefully position the precut film, starting from one edge and gradually working across the panel. Use soft, non-abrasive squeegees to remove air bubbles and excess solution, applying consistent but gentle pressure to ensure smooth adhesion without damaging the film or underlying paint surface.
Professional squeegee techniques involve using overlapping strokes from the centre outwards, maintaining a 45-degree angle to effectively push out air and solution. Work systematically, focusing on one section at a time, and avoid aggressive stretching that could compromise film integrity. Pay particular attention to complex curves and panel edges, where precise application becomes most challenging.
Critical tools for ppf precut application include:
- Professional grade squeegees
- Slip solution spray bottle
- Microfibre towels
- Heat gun for final film activation
- Precision cutting knife
Verify successful application by checking for uniform adhesion, absence of air bubbles, and crisp, clean edges. Gently run your fingers along the film’s surface, feeling for any imperfections or lifted areas. A perfectly applied ppf precut film should appear seamless, with no visible edges or trapped contaminants.
Step 5: Check for Bubbles and Imperfections Post-Application
Comprehensive inspection following ppf precut installation represents the final critical phase that determines the professional quality of your work. Meticulous examination ensures long-term film performance and protects your reputation as a skilled automotive protection specialist.
Begin the inspection process approximately 24 hours after installation, allowing sufficient time for the adhesive to settle and any residual moisture to evaporate. Natural light provides the best conditions for detecting subtle imperfections, so position the vehicle in a well-lit area with neutral background colours. Use multiple lighting angles to reveal potential issues that might be invisible from a single perspective.
Discover common installation mistakes and their prevention strategies to enhance your understanding of potential post-application challenges. Systematically examine each panel, running your hands gently across the film surface to detect microscopic bubbles, lifted edges, or texture inconsistencies. Professional installers recommend using a combination of visual and tactile inspection techniques to identify even the most minute imperfections.
Focus on problematic areas that typically require extra attention, including panel edges, complex curves, and regions around vehicle contours. Trapped air bubbles smaller than 1mm can often be worked out using gentle heat application from a professional-grade heat gun, maintaining a consistent distance to prevent film damage. Larger bubbles or significant imperfections might necessitate partial film removal and reapplication.
Critical inspection tools for ppf precut verification include:
- Bright LED inspection light
- Magnifying glass
- Microfibre inspection cloth
- Professional heat gun
- Ceramic coating inspection gloves
Verify successful installation by conducting a final comprehensive check. The ppf precut film should appear seamless, with no visible edges, air pockets, or texture variations. When running your hand across the surface, you should feel a smooth, consistent finish without any irregularities. Any detected imperfections should be addressed immediately to maintain the highest professional standards of automotive paint protection.
Step 6: Finalise and Protect the PPF Installed Area
Professional ppf precut installation extends beyond application, requiring strategic post-installation care to ensure long-term protection and aesthetic performance. Proper finalisation represents the critical bridge between installation and sustained vehicle protection, transforming a technical process into a comprehensive preservation strategy.
Initiate the finalisation process by allowing the ppf precut film a recommended curing period of 48 to 72 hours. During this time, avoid exposing the vehicle to extreme temperatures, direct sunlight, or high-humidity environments. Minimal contact and controlled environmental conditions enable the adhesive to settle completely, establishing a robust bond between the film and vehicle surface.
Understand the comprehensive mechanics of paint protection films to appreciate the intricate technology protecting automotive surfaces. Apply a specialised ceramic coating designed for ppf to enhance film durability and create an additional protective layer. This supplementary treatment amplifies the film’s self-healing properties, increases resistance to environmental contaminants, and provides a hydrophobic surface that repels water, dirt, and potential staining agents.
Carefully select maintenance products specifically formulated for paint protection films. Avoid aggressive cleaning chemicals, abrasive materials, or automatic car washing systems that could compromise film integrity. Recommend gentle, pH-neutral cleaning solutions and microfibre towels for routine maintenance, ensuring the ppf precut film remains pristine and continues providing optimal protection.
Essential finalisation and protection tools include:
- Ceramic coating applicator
- Microfibre maintenance towels
- pH-neutral automotive cleaning solution
- Soft edge detailing brushes
- Professional-grade spray sealant
Verify successful finalisation by conducting a comprehensive visual and tactile inspection. The ppf precut film should exhibit a uniform, glossy appearance with no visible edges or imperfections. When touched, the surface should feel smooth and demonstrate water-beading characteristics, indicating effective protection and maintenance. Regular professional inspections every six months will help maintain the film’s exceptional performance and aesthetic quality.
Transform Your PPF Installations with Precision Patterns
Are you struggling with inaccurate measurements, material waste or time-consuming manual cutting during your PPF installations? The guide above highlights just how critical precise patterns and efficient application are for a seamless result. Every step, from workspace preparation to final inspection, hinges on having patterns that fit perfectly, minimising errors and ensuring your work stands out. The right tools and software can remove the frustration and guesswork, letting you focus on flawless paint protection that delights your clients. Discover how the PPF precut pattern solutions from AEONCUT empower you to level up your installation workflow with confidence.

Stop letting pattern limitations limit your professional results. Visit https://aeoncutsw.com and explore the unmatched accuracy of PPF software designed for industry leaders. With an extensive pattern library, AI precision and ongoing updates, you can eliminate common installation headaches and deliver the best PPF protection for every vehicle. Take control of your next project now and see what reliable patterns can do for your business.
Frequently Asked Questions
How do I prepare my workspace for PPF installation?
To prepare your workspace for PPF installation, select a clean, enclosed area with minimal air movement and dust. Ensure the temperature is maintained between 20 to 25 degrees Celsius and humidity around 50%. Clean all surfaces using isopropyl alcohol and use lint-free microfibre cloths. Essential tools include a dust extraction system and high-quality cleaning materials.
What is the importance of measuring when cutting PPF precut materials?
Measuring is essential to ensure accurate coverage of vehicle panels. Precise measurements help avoid installation errors and ensure proper alignment, especially around curves and edges. Allow for a slight overlap to accommodate minor variations during installation for a seamless finish.
What cleaning methods should I use before applying PPF?
Start with a comprehensive initial wash using pH-neutral car shampoo. Follow up with a clay bar treatment to remove embedded contaminants. Finish with a chemical decontamination using isopropyl alcohol solutions to eliminate oils and residues. This thorough cleaning is crucial for optimal film adhesion.
How can I check for bubbles and imperfections after applying PPF?
Inspect the application 24 hours post-installation in natural light. Run your hands over the film to feel for air bubbles or lifted edges. Use a heat gun to gently address trapped air bubbles under 1mm in size. Larger imperfections may require partial film removal and reapplication.
Recommended
- How to Create Custom PPF Patterns Using Aeoncut: Step-by-Step Guide – AEONCUT PPF Pre-cut Cutting software
- How to Create Custom PPF Patterns Using Aeoncut: Step-by-Step Guide – AEONCUT PPF Pre-cut Cutting software
- Como crear patróns PPF personalizados con Aeoncut: guía paso a paso: software de corte precortado PPF AEONCUT
- PPF Cutting Software: Essential Guide for Installers 2025 – AEONCUT PPF Pre-cut Cutting software


