Every experienced PPF and tint installer knows that precise pattern reading can make or break an automotive customisation project. The difference between a flawless finish and wasted material often comes down to preparation and mastery of digital techniques. With the latest tools allowing for dedicated digital pattern reference materials and high-accuracy scanning, today’s professionals can achieve factory-level results across complex vehicle geometries. This guide reveals clear, actionable steps to help you transform your workspace and sharpen your pattern skills for consistently outstanding installations.
Table of Contents
- Step 1: Prepare Workspace And Select Digital Pattern
- Step 2: Understand Pattern Symbols And Measurement Details
- Step 3: Interpret Cut Lines And Shape Contours
- Step 4: Customise Pattern Dimensions For Vehicle Model
- Step 5: Verify Pattern Alignment And Ensure Accuracy
Quick Summary
| Key Point | Explanation |
|---|---|
| 1. Organise workspace for precision | A clean, flat surface with good lighting is essential for professional automotive film cutting. |
| 2. Use specific digital patterns | Ensure patterns match vehicle make, model, year, and are compatible with your cutting software. |
| 3. Understand pattern symbols thoroughly | Recognising fold lines, cut lines, and registration marks is crucial for seamless film application. |
| 4. Customise pattern dimensions accurately | Employ digital scanning to ensure patterns fit unique vehicle contours for optimal coverage. |
| 5. Verify pattern alignment diligently | Conduct thorough checks to confirm dimensional accuracy and alignment to prevent costly mistakes. |
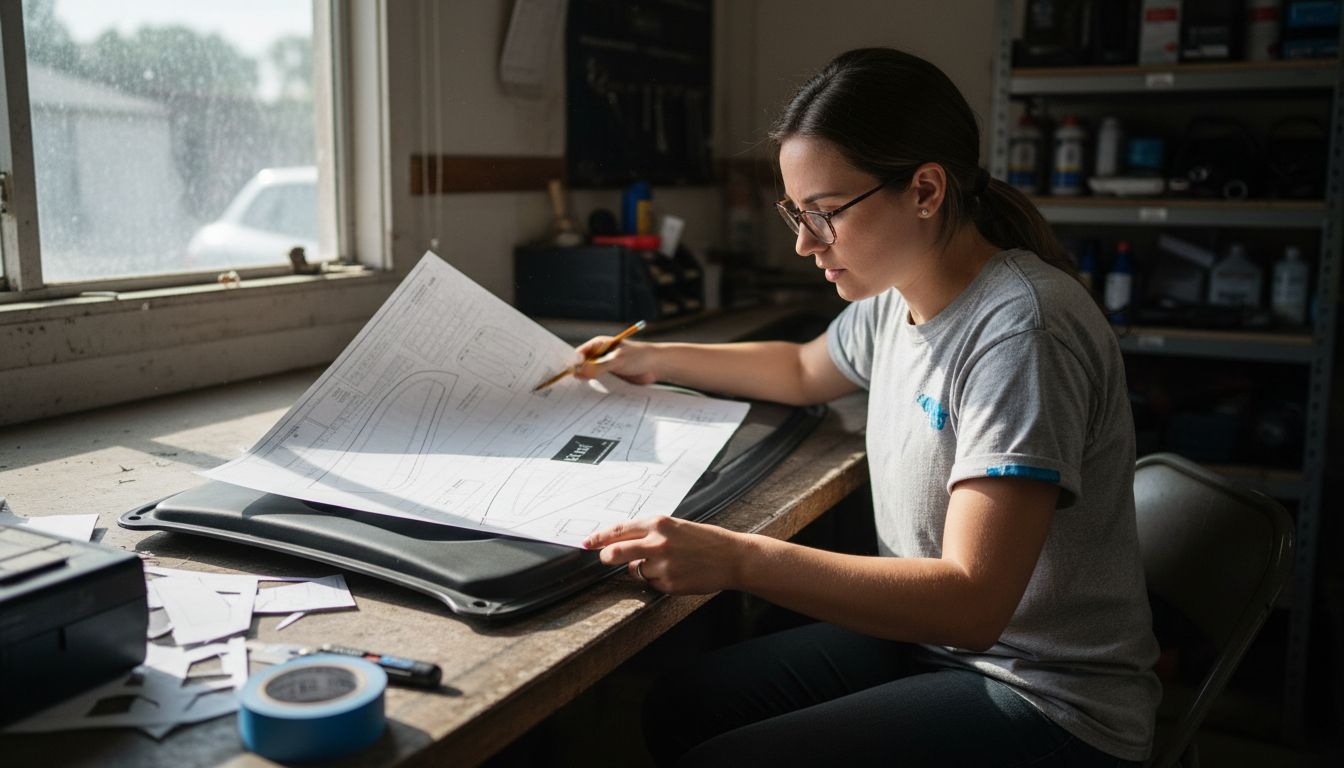
Step 1: Prepare workspace and select digital pattern
Preparing your workspace for precise automotive film cuts requires methodical organisation and strategic planning. Professional installers understand that initial setup determines the quality of the final product.
Begin by clearing a clean, flat surface large enough to accommodate your cutting materials and digital pattern references. Ideally, this workspace should have good lighting and minimal dust contamination. Your cutting area needs dedicated digital pattern reference materials and enough room to manoeuvre film rolls and cutting equipment.
Selecting the right digital pattern involves several crucial steps:
- Confirm the exact vehicle make, model, and year
- Match vehicle specifications with corresponding pattern library
- Verify digital pattern resolution and compatibility
- Check file format requirements for your specific cutting software
Configuring digital pattern settings requires precision and attention to detail. Ensure your selected digital pattern matches the vehicle’s exact dimensions and incorporates minimal waste material.
Professional pattern selection minimises material waste and ensures optimal film coverage.
Professional tip: Always calibrate your digital pattern against manufacturer specifications and create a test cut before committing to the full installation.
Step 2: Understand pattern symbols and measurement details
Mastering pattern symbols and measurement details is a critical skill for automotive film installation professionals. These intricate markings provide essential guidance for achieving precise and seamless film application across vehicle surfaces.
Understanding pattern symbols requires careful attention to specific visual indicators. Pattern symbol interpretation involves recognising key graphical elements that communicate crucial installation instructions:
- Fold lines: Indicate where film should be flexed or bent
- Cut lines: Precise boundaries for trimming film sections
- Overlap zones: Areas requiring strategic film positioning
- Registration marks: Reference points for accurate alignment
Measurement details are equally vital for successful installation. Professional installers must pay close attention to:
- Exact length specifications
- Width measurements
- Contour precision
- Material stretch tolerances
Accurate symbol and measurement comprehension determines the quality of paint protection film installation.
Professional tip: Always cross-reference pattern measurements with vehicle-specific templates and use digital magnification tools to verify intricate symbol details.
This table offers a quick reference to common digital pattern features and their practical impact during installation:
| Pattern Feature | Role in Installation | Impact on Quality |
|---|---|---|
| Fold Lines | Guides correct film bending | Prevents improper fit |
| Registration Marks | Aids precise pattern alignment | Ensures flawless edge finishing |
| Overlap Zones | Indicates strategic positioning requirements | Eliminates visible seams |
| Cut Lines | Defines exact film section boundaries | Reduces trimming errors |
Step 3: Interpret cut lines and shape contours
Successful automotive film installation demands precise interpretation of cut lines and shape contours. Understanding these critical elements ensures a seamless, professional-grade application that conforms perfectly to vehicle surfaces.
Digital cutting technologies have transformed how installers analyse vehicle geometries, enabling unprecedented precision in pattern interpretation. The process involves several key techniques:
- Trace vehicle-specific contours: Analyse each unique surface curve
- Identify critical boundary points: Mark exact cut line locations
- Verify digital pattern accuracy: Cross-reference with vehicle specifications
- Account for material stretch: Understand film elasticity limitations
Key considerations for interpreting cut lines include:
- Recognising subtle surface variations
- Understanding material behaviour during stretching
- Compensating for potential geometric complexities
- Maintaining consistent cutting pressure
Precision in cut line interpretation separates professional installers from amateurs.
Professional tip: Always use high-resolution digital references and perform multiple test cuts to validate your pattern interpretation before final installation.
Step 4: Customise pattern dimensions for vehicle model
Customising pattern dimensions requires precise measurement and advanced digital technologies to ensure perfect film application across different vehicle surfaces. Professional installers must approach this process with meticulous attention to detail.
3D scanning technologies have revolutionised pattern dimension customisation by capturing ultra-precise vehicle measurements. The customisation process involves several critical steps:
- Capture accurate vehicle measurements: Use digital scanning equipment
- Analyse surface geometry: Identify unique contour characteristics
- Translate digital measurements: Convert scan data into cutting patterns
- Verify dimensional accuracy: Cross-reference with original vehicle specifications
Key considerations for effective pattern dimension customisation include:
- Understanding material elasticity
- Accounting for vehicle panel curvature
- Compensating for potential measurement variations
- Maintaining consistent scaling techniques
Precise pattern dimension customisation transforms generic film patterns into vehicle-specific solutions.
Professional tip: Always perform multiple digital scans and create test cut samples to validate your dimensional customisation before final film application.
Step 5: Verify pattern alignment and ensure accuracy
Pattern verification represents the critical final checkpoint in automotive film installation, where precision determines the quality of the entire project. Professional installers understand that thorough alignment verification prevents costly mistakes and ensures a flawless result.
Digital validation techniques transform pattern verification from a subjective process to a precise, measurable procedure. The verification process encompasses multiple strategic approaches:
- Conduct digital overlay checks: Confirm pattern matches vehicle contours
- Compare digital and physical measurements: Validate dimensional accuracy
- Inspect potential interference zones: Identify potential misalignment risks
- Perform multiple verification passes: Eliminate potential error margins
Key verification strategies include:
- Using high-resolution digital previews
- Cross-referencing CAD model specifications
- Checking material stretch tolerances
- Evaluating edge alignment precision
Meticulous pattern verification separates professional installations from amateur attempts.
Professional tip: Develop a systematic verification checklist and consistently apply it across every installation to maintain professional standards and minimise potential errors.
The following table summarises the key differences between professional and amateur automotive film installation approaches:
| Aspect | Professional Approach | Amateur Approach |
|---|---|---|
| Workspace Preparation | Highly organised and clean | Often cluttered or ad hoc |
| Pattern Selection | Vehicle-specific, calibrated to specs | Generic or loosely matched |
| Measurement Accuracy | Uses precision tools and digital references | Relies on manual estimation |
| Verification Process | Multiple digital checks and test cuts | Minimal or skipped verification |
Achieve Flawless Automotive Film Cuts with Precision Software
Understanding digital pattern symbols, cut lines and custom dimension adjustments are essential skills for professional automotive film installers. The challenges of workspace preparation, pattern selection and meticulous verification can lead to costly errors and wasted materials without the right tools. This article highlights how mastering these crucial steps demands accuracy, detailed measurement and reliable pattern alignment.
Elevate your installation workflow by choosing AEONCUT software, a cutting-edge solution designed specifically for automotive paint protection film and tint professionals. With extensive pattern libraries, AI-powered auto-nesting and real-time cloud updates, AEONCUT ensures you access perfectly calibrated, vehicle-specific digital patterns that reduce waste and enhance precision. Protect your investment in time and material by leveraging advanced pattern customisation and verification features tailored to exact vehicle specifications.

Ready to transform how you read and cut automotive film patterns? Visit aeoncutsw.com today to explore subscription plans that fit your professional or DIY needs and gain access to powerful tutorials and support. Don’t let inaccurate patterns or poor alignment hold back your craftsmanship. Start delivering flawless, high-quality film installations with the trusted AEONCUT digital cutting platform now.
Frequently Asked Questions
How do I select the right digital pattern for automotive film cuts?
To select the right digital pattern, confirm the vehicle’s make, model, and year, and match this information with a corresponding pattern library. Review the pattern’s resolution and ensure it’s compatible with your cutting software before proceeding to production.
What are the key symbols I need to understand when reading patterns for automotive film?
Key symbols include fold lines, cut lines, overlap zones, and registration marks. Familiarise yourself with these indicators to ensure accurate installation and to understand where the film should be trimmed or positioned on the vehicle.
How can I ensure accurate measurement for customising film patterns?
To ensure accuracy, use digital scanning equipment to capture precise vehicle measurements and analyse the surface geometry. Cross-reference your findings with the original vehicle specifications to validate your customisation.
What is the best way to verify pattern alignment before installation?
Conduct digital overlay checks to confirm that the pattern accurately matches the vehicle’s contours. Compare the digital measurements with the physical ones to identify and correct any potential misalignments prior to final installation.
How can I improve my pattern reading skills for automotive film installation?
Improving your skills involves studying the intricate details of each digital pattern, including understanding measurement tolerances and film elasticity. Conducting regular test cuts will also help you recognise potential issues and improve precision in your installations.
Recommended
- How to Create Custom PPF Patterns Using Aeoncut: Step-by-Step Guide – AEONCUT PPF Pre-cut Cutting software
- How to Create Custom PPF Patterns Using Aeoncut: Step-by-Step Guide – AEONCUT PPF Pre-cut Cutting software
- Como crear patróns PPF personalizados con Aeoncut: guía paso a paso: software de corte precortado PPF AEONCUT
- Top 5 PPF and Tint Cutting Software for Professionals 2025 – AEONCUT PPF Pre-cut Cutting software


