
Searching for window tinting costs near you often reveals prices ranging wildly from £120 to over £700, leaving many vehicle owners confused about what they should actually pay. The variation isn’t random; professional car window tinting costs depend heavily on your vehicle size, chosen film type, and local installer expertise. This 2026 guide breaks down typical pricing in your area, explains what drives costs up or down, and helps you choose between dyed, metalised, and ceramic films. You’ll also discover compliance essentials and whether DIY tinting makes financial sense for your situation.
Table of Contents
- Typical Window Tinting Costs By Vehicle Type And Film
- Types Of Window Tint Film And How They Affect Price And Performance
- Installation Quality, Compliance, And Diy Factors Affecting Window Tinting Costs
- Discover Software And Guides To Master Window Tinting In 2026
- Frequently Asked Questions
Key takeaways
| Point | Details |
|---|---|
| Price range | Window tinting costs typically range from £120 to £720, varying by vehicle size and film type |
| Film options | Dyed film is the most affordable option with a shorter lifespan; ceramic tints are premium but last longest |
| Professional installation | Prices include quality and compliance considerations, with mobile services adding convenience fees |
| Legal compliance | Local laws affect permissible tint levels, so compliance is essential to avoid fines |
| DIY consideration | DIY tinting can save money but requires careful preparation and tools |
Typical window tinting costs by vehicle type and film
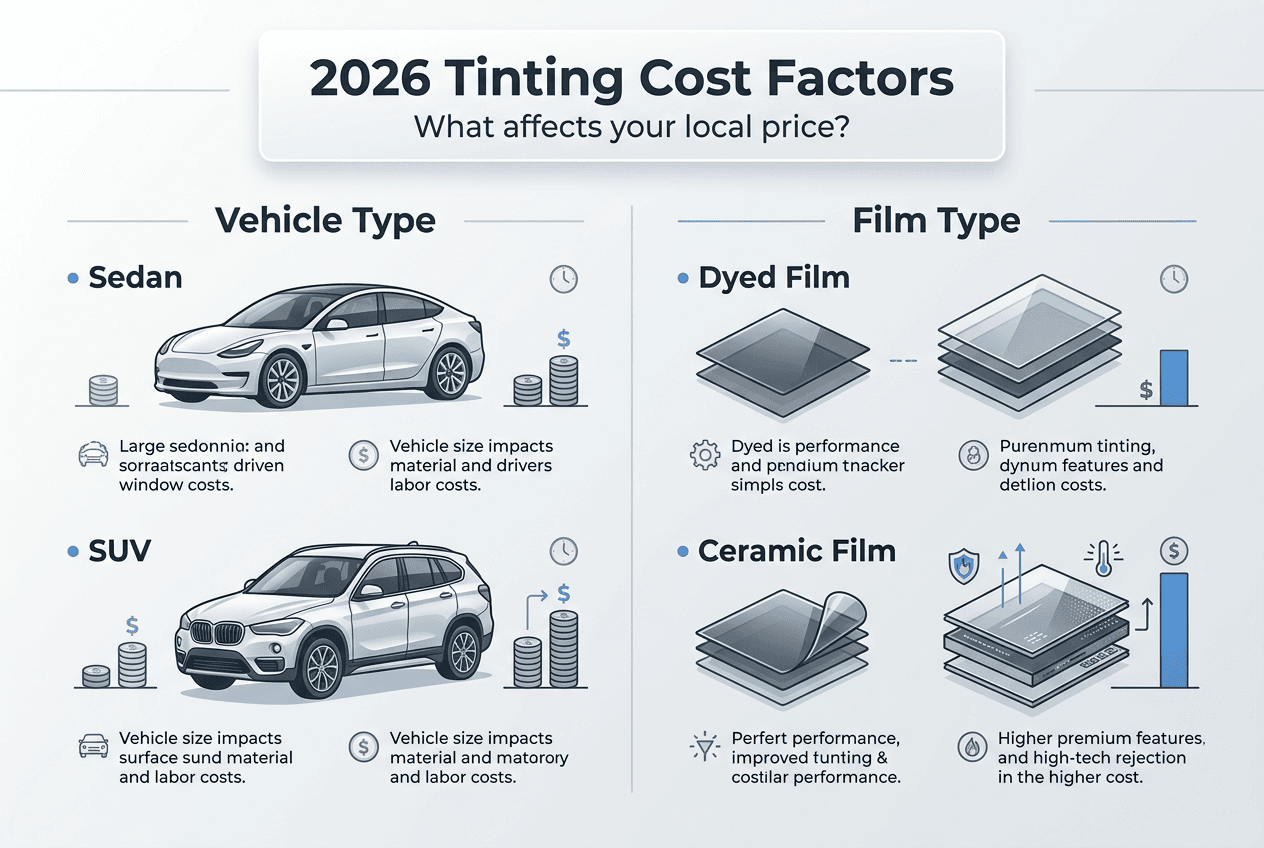
Vehicle size creates the first major price split when you request quotes from local installers. Sedans generally cost £120 to £360 for complete window tinting, whilst SUVs and larger vehicles cost 25 to 40% more due to increased glass surface area and labour time. Trucks and vans push the upper boundary to £200 through £720, especially when rear cargo windows require coverage.
Film type dramatically shifts these baseline figures. Dyed films represent the budget category at approximately £120 to £280 for sedans, offering an attractive dark appearance but limited heat rejection. These films typically last three to five years before fading or bubbling occurs. Metalised options sit in the middle range at £200 to £370, providing better heat rejection and added shatter resistance. Ceramic films command premium pricing from £320 to £640 or higher, but deliver superior performance and longevity exceeding ten years.
Mobile installers bring convenience directly to your home or workplace, yet this service adds a 10 to 15% premium to standard shop rates. The convenience factor appeals to busy professionals who cannot spare hours at a tinting shop, but you pay for that flexibility. Quality installation protects your investment by ensuring proper adhesive bonding and scratch resistance, so extremely cheap options often signal corner cutting that leads to premature failure.
Pro Tip: Request itemised quotes that separate film costs from labour charges, allowing you to compare installers fairly and understand exactly what you’re paying for.
Here’s how costs typically break down by vehicle category:
| Vehicle Type | Dyed Film | Metalised Film | Ceramic Film |
| — | — | — |
| Sedan | £120-280 | £200-360 | £320-520 |
| SUV/Crossover | £200-360 | £280-440 | £400-600 |
| Truck/Van | £200-400 | £280-520 | £440-720 |
Consider these factors when evaluating quotes from local installers:
- Glass surface area directly correlates with material and labour time requirements
- Curved or complex window shapes increase installation difficulty and cost
- Number of windows being tinted affects total price significantly
- Rear window defroster grids require extra care and skill
- Existing tint removal adds £40 to £80 to your total bill
Local labour rates vary by region, with urban areas typically charging 15 to 25% more than rural locations due to higher overhead costs. Installer experience matters tremendously; seasoned professionals charge premium rates but deliver cleaner results with fewer defects. The cost of window tinting reflects these combined variables, making direct price comparisons challenging without understanding the underlying factors.
Types of window tint film and how they affect price and performance
Dyed window film creates its dark appearance through multiple dye layers sandwiched between adhesive and protective coatings. This budget option costs £120 to £280 for most sedans and provides excellent glare reduction plus basic privacy. However, dyed tint has minimal heat rejection and a three to five year lifespan before colour fading becomes noticeable. The dye absorbs rather than reflects heat, limiting its effectiveness in hot climates. Vehicle owners choosing dyed film prioritise appearance and privacy over thermal comfort.
Metalised tint incorporates tiny metallic particles that reflect heat and UV radiation more effectively than dyed alternatives. Priced between £200 and £370, this mid-range option adds shatter resistance by reinforcing the glass structure. The metallic layer creates a slightly reflective exterior appearance that some drivers prefer. One significant drawback: metalised films can interfere with mobile phone signals, GPS navigation, and radio reception. Modern vehicles with extensive electronic systems may experience connectivity issues, making this option less suitable despite its improved heat rejection.
Ceramic window tint represents the premium category, utilising nano-ceramic particles to block up to 95% of infrared radiation and 99.9% of harmful UV rays without any metallic content. Prices start at £320 and commonly exceed £640 for larger vehicles, but the investment delivers exceptional performance. Ceramic particles reject heat through advanced nanotechnology whilst maintaining optical clarity and causing zero signal interference. These films last over ten years without fading, bubbling, or peeling when properly installed. The superior UV protection also prevents interior fading and cracking, protecting your vehicle’s resale value.
Pro Tip: Ceramic tint pays for itself over time through reduced air conditioning costs and preserved interior condition, making it the smartest long-term investment despite higher upfront pricing.
Compare the key characteristics across film types:
| Feature | Dyed Film | Metalised Film | Ceramic Film |
|---|---|---|---|
| Heat Rejection | 30-40% | 40-60% | 60-95% |
| UV Protection | 95-99% | 99% | 99.9% |
| Signal Interference | None | Moderate | None |
| Lifespan | 3-5 years | 5-7 years | 10+ years |
| Appearance | Flat black | Reflective | Clear/neutral |
Choosing the right film depends on your priorities and budget constraints. Consider these decision factors:
- Climate conditions in your area affect heat rejection importance
- Vehicle usage patterns determine durability requirements
- Electronic device dependency makes signal interference critical
- Aesthetic preferences influence reflective versus matte appearance choices
- Long-term ownership plans justify premium film investments
Hybrid films combine dyed and metalised layers to balance cost and performance, typically priced between standard metalised and ceramic options. These products attempt to minimise signal interference whilst improving heat rejection beyond pure dyed films. However, they represent a compromise rather than excelling in any single category. The ceramic window tint benefits become increasingly apparent as you research performance differences and calculate long-term value.
Manufacturer warranties vary dramatically by film type. Dyed films rarely include warranties beyond one year, whilst ceramic products often carry lifetime guarantees against fading, bubbling, and peeling. Read warranty terms carefully, as many require professional installation and exclude damage from improper care or accidents. The warranty protection adds value to premium films by ensuring your investment remains protected for years.
Installation quality, compliance, and DIY factors affecting window tinting costs
Installation quality separates professional results from disappointing outcomes that require costly redoing. Experienced installers invest in climate-controlled environments, precision cutting tools, and proper cleaning solutions that eliminate contamination. These facilities command higher prices but deliver bubble-free, perfectly aligned tint that adheres properly and lasts its full expected lifespan. Cheap installations in dusty garages or outdoor settings inevitably trap debris under the film, creating unsightly spots and premature adhesive failure.
Mobile installation services bring professional equipment to your location, adding 10 to 15% to standard shop rates for the convenience factor. Quality mobile installers maintain the same standards as shop-based work, using portable clean rooms and proper lighting. However, some mobile operators cut corners by working in less-than-ideal conditions, so verify their setup before committing. The convenience appeals to busy professionals, but ensure you’re not sacrificing quality for location flexibility.
Local regulations governing window tint darkness and placement vary significantly by region and must be checked before installation. Non-compliant window tint leads to fines or costly reinstallation when authorities enforce these rules during routine traffic stops or vehicle inspections. Front windscreen tinting faces the strictest limitations, typically allowing only a strip along the top edge. Front side windows usually require higher visible light transmission than rear windows. Ignoring these regulations creates legal headaches and wastes your tinting investment.
Pro Tip: Always request compliance documentation from your installer showing that your chosen tint meets local regulations, protecting you from potential fines and providing proof during inspections.
DIY tinting offers substantial labour cost savings, potentially reducing your total expense by 40 to 60%. However, successful DIY installation demands meticulous preparation and proper technique.
Proper window cleaning and dust-free conditions prove critical for avoiding bubbles and contamination. You’ll need specific tools including squeegees, heat guns, precision knives, and quality cleaning solutions. Many first-time DIY attempts result in frustration, wasted film, and eventual professional reinstallation that costs more than hiring an expert initially.
Follow these steps for successful DIY window tinting:
- Clean windows thoroughly with ammonia-free cleaner and lint-free cloths
- Measure and cut film pieces with 2-3cm excess on all sides
- Apply soapy water solution to window surface and film adhesive
- Position film carefully and squeegee out water from centre outward
- Trim excess film with sharp blade held at consistent angle
- Apply heat to conform film around curves and edges
- Final squeegee pass removes remaining water and air bubbles
Common DIY mistakes include:
- Insufficient cleaning leaving dust particles under film
- Cutting film too small and exposing window edges
- Inadequate water solution causing premature adhesive bonding
- Excessive heat application melting or distorting film
- Rushing the process before proper adhesive curing
The learning curve for quality DIY tinting spans multiple attempts, making your first vehicle a practice run rather than a perfect result. Pre-cut tint kits reduce difficulty by eliminating pattern creation, but still require careful application technique. Budget an extra 20 to 30% for film waste during your learning process. The window tinting compliance tips and car window tint limit resources help ensure your DIY project meets legal requirements from the start.
Installer reputation and customer reviews provide valuable insight into quality and reliability. Check multiple review platforms and ask for references from recent customers. Quality installers gladly show examples of their work and explain their process in detail. They also offer realistic timelines, typically requiring four to six hours for complete vehicle tinting including proper curing time. Rushed jobs completed in under two hours raise red flags about corner cutting.
Understanding how to price window tinting from an installer’s perspective helps you evaluate whether quotes reflect fair value or excessive markup. Material costs represent only 20 to 30% of total pricing, with labour, overhead, and expertise commanding the majority. Extremely low quotes often indicate inexperienced installers using inferior films or working in substandard conditions.
Discover software and guides to master window tinting in 2026
Whether you’re a professional installer seeking efficiency gains or a DIY enthusiast pursuing perfect results, the right tools transform your tinting outcomes. AEONCUT’s window tint software delivers precision-cut patterns that eliminate guesswork and reduce material waste by up to 40%.

Stay compliant with evolving regulations using comprehensive 2026 tinting regulations guides that cover regional requirements and inspection standards. Master fundamental techniques through detailed window tinting basics tutorials that accelerate your learning curve and improve installation quality. These resources help you avoid costly mistakes whilst achieving professional-grade results that satisfy customers and pass inspections consistently.
Frequently asked questions
How much does professional window tinting cost on average?
Professional window tinting typically costs between £120 and £720 depending on your vehicle size and chosen film type. Sedans fall at the lower end whilst trucks and vans with extensive glass push toward the upper range. Film selection dramatically impacts pricing, with dyed options starting around £120 and premium ceramic films exceeding £640 for larger vehicles. Local installer rates and regional labour costs create additional variation, so request multiple quotes for accurate comparison. The cost of window tinting guide provides detailed breakdowns by vehicle category and film type.
What factors influence the price of window tinting near me?
Vehicle size creates the primary cost variable, as larger glass surface areas require more material and labour time. Film type significantly affects pricing, with ceramic options costing two to three times more than dyed alternatives. Installation quality and installer experience command premium rates but deliver superior results and longevity. Local labour rates vary by region, with urban areas typically charging 15 to 25% more than rural locations. Mobile installation convenience adds another 10 to 15% to standard shop pricing. Legal compliance requirements may necessitate specific film types or darkness levels that influence your final cost. Understanding pricing window tinting profitably from an installer’s perspective helps you evaluate quote fairness.
Is ceramic window tint worth the higher price compared to dyed or metalised films?
Ceramic tint delivers exceptional value despite higher upfront costs through superior heat rejection, UV protection, and longevity. The technology blocks up to 95% of infrared radiation and 99.9% of harmful UV rays whilst maintaining optical clarity and causing zero signal interference with electronic devices. Ceramic films last over ten years without fading or bubbling, compared to three to five years for dyed alternatives. The enhanced UV protection preserves interior materials and prevents cracking or fading that damages resale value. Reduced air conditioning usage in hot climates creates ongoing energy savings that offset the initial premium. Vehicle owners prioritising comfort, durability, and long-term value find ceramic tint justifies its higher price through cumulative benefits. Explore detailed ceramic window tint benefits to understand the full performance advantages.
Can I tint my car windows myself, and how does DIY compare cost-wise?
DIY tinting can save 40 to 60% on labour costs, reducing your total expense significantly if you achieve quality results. However, successful installation demands meticulous preparation, proper tools, and careful technique. Proper window cleaning and dust-free conditions prove essential for avoiding bubbles, contamination, and premature adhesive failure. First-time attempts often result in mistakes requiring film replacement, potentially costing more than professional installation initially. Pre-cut tint kits simplify the process by eliminating pattern creation but still require skilled application. Budget extra film for practice and inevitable errors during your learning process. Professional installation guarantees proper adhesive bonding, compliance with local regulations, and warranty protection that DIY work cannot match.
Recommended
- 7 Ways to Compare Window Tinting Near Me with Prices – AEONCUT PPF Pre-cut Cutting software
- Cost of Window Tinting: 2025 Guide for Installers – AEONCUT PPF Pre-cut Cutting software
- Commercial window tinting cost guide for installers 2026 – AEONCUT PPF Pre-cut Cutting software
- 7 Key Insights Into Car Window Tinting Prices Near Me – AEONCUT PPF Pre-cut Cutting software

