Car paint damage from stone chips, scratches, and UV exposure costs UK vehicle owners thousands annually in depreciation and repairs. Paint protection film shields vehicle surfaces from chips, scratches, and UV damage, preserving appearance and value. Whether you’re an automotive professional seeking efficient installation methods or a DIY enthusiast wanting to protect your investment, finding quality local services or mastering self-application techniques ensures your vehicle maintains its showroom finish. This guide walks you through locating trusted installers, understanding film types, and applying protection film yourself with professional results.
Table of Contents
- Understanding Paint Protection Film And Its Benefits
- How To Find Reliable Protection Film Services Near You
- Step-By-Step Guide To Installing Protection Film Yourself
- Troubleshooting Common Issues And Verifying A Quality Installation
- Find Expert Paint Protection Film Services With Aeoncut
- Frequently Asked Questions
Key takeaways
| Point | Details |
|---|---|
| Professional installation quality | Selecting professional installers improves application quality, longevity, and warranty coverage significantly. |
| Film type selection | Clear, coloured, and matte finish films offer different aesthetic and protective properties for various vehicle needs. |
| DIY installation success | Proper surface preparation and application technique are critical to avoid bubbles, wrinkles, and lift. |
| Quality verification | Inspecting film edges, bubbles, and adhesion confirms installation quality and longevity post application. |
Understanding paint protection film and its benefits
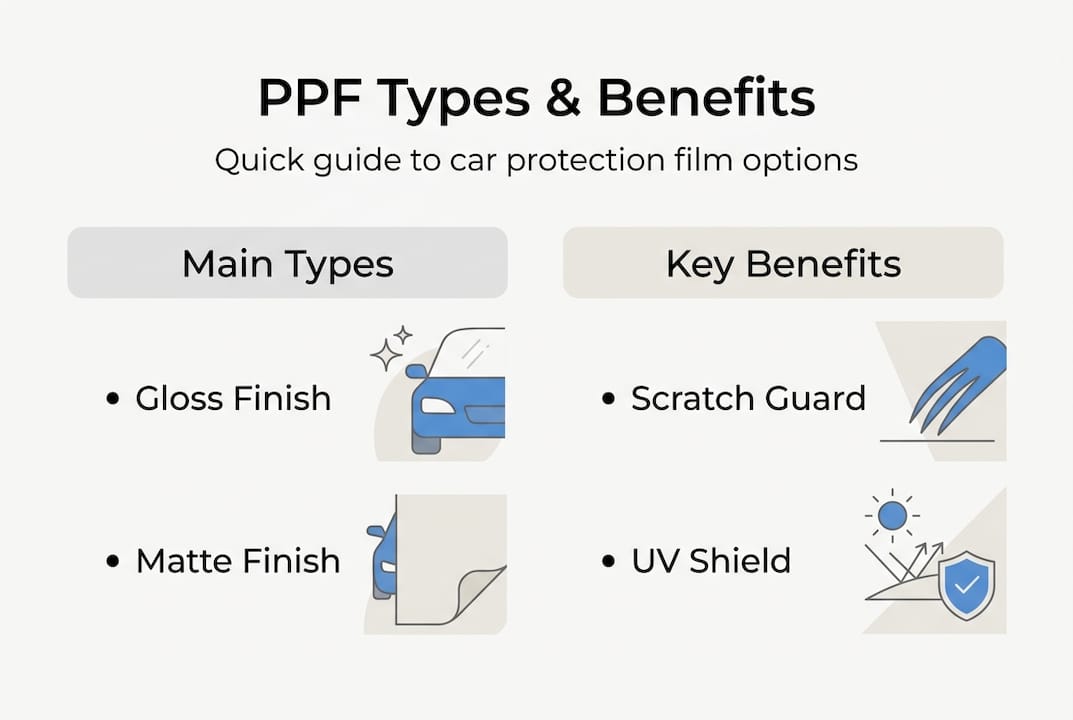
Paint protection film, commonly called PPF or clear bra, is a thermoplastic urethane layer applied to vehicle surfaces vulnerable to damage. This transparent barrier absorbs impacts from road debris, resists chemical staining from bird droppings and tree sap, and self-heals minor scratches through heat activation. Understanding paint protection film for cars reveals how modern formulations have evolved beyond basic clear films.
Three primary film types dominate the market, each serving distinct aesthetic and functional purposes. Clear gloss films maintain your vehicle’s original paint appearance whilst providing invisible protection, ideal for preserving factory finishes on high-value cars. Coloured films add custom tints or complete colour changes alongside protective benefits, popular amongst enthusiasts wanting personalisation without permanent paint modifications. Matte finish films create a sophisticated flat appearance that’s become increasingly fashionable on luxury and performance vehicles, though they require specific cleaning techniques to maintain their unique texture.
The protective advantages extend far beyond superficial scratch prevention:
- Stone chip resistance on bonnets, bumpers, and wing mirrors prevents costly paint repairs
- UV protection maintains paint vibrancy and prevents oxidation over years of sun exposure
- Chemical resistance shields against acidic contaminants that etch unprotected paint
- Self-healing properties allow minor scratches to disappear with heat application
- Resale value preservation through maintained paint condition appeals to future buyers
For professional installers, understanding these distinctions helps match client needs with appropriate film specifications. DIY enthusiasts benefit from knowing that whilst clear films offer the most forgiving installation experience, coloured and matte variants demand greater precision due to visible seams and texture inconsistencies if applied incorrectly. Film thickness typically ranges from 6 to 8 mils, with thicker variants providing superior impact resistance but requiring more skill to manipulate around complex curves and body lines.
How to find reliable protection film services near you
Locating quality local installers requires more than a simple internet search, as installation expertise varies dramatically between providers. Start by searching automotive forums specific to your vehicle make, where enthusiasts share firsthand experiences with local shops and highlight both exceptional work and installations gone wrong. Facebook groups dedicated to car detailing and protection in your region often feature portfolio posts from installers, allowing you to assess their work quality before making contact.
Once you’ve identified potential installers, verify their credentials and experience level. Look for certifications from major film manufacturers like XPEL, 3M, or SunTek, which indicate formal training in application techniques and access to warranty programmes. An installer’s portfolio should demonstrate experience with vehicles similar to yours, particularly if you own a car with complex curves or unique body panels that challenge standard application methods. Ask how long they’ve specialised in PPF installation, as technicians with five or more years typically produce noticeably superior results compared to those offering it as a sideline service.
Customer reviews provide crucial insights beyond what promotional materials reveal:
- Google Reviews and Trustpilot ratings highlight consistency across multiple clients
- Before and after photos in reviews confirm the installer can handle your vehicle type
- Negative review responses demonstrate how the business handles problems
- Detailed testimonials mentioning specific challenges overcome indicate problem-solving skills
Compare service offerings and pricing structures carefully, as the cheapest quote rarely delivers the best value. Quality installers typically charge between £500 and £3,000 depending on coverage area, with full front-end protection costing more than partial bonnet applications. Ask whether quotes include paint correction before application, as installing film over existing scratches or swirl marks permanently seals those imperfections beneath the protective layer. Warranty terms matter significantly, with reputable installers offering five to ten-year coverage on both materials and workmanship.
Pro Tip: Visit potential installers in person to assess their workspace cleanliness and organisation. Professional PPF application requires a dust-free environment, so shops with cluttered bays or visible contamination often produce installations plagued by debris trapped under the film.
Request to see paint protection film installers types working on current projects if possible. Watching their technique, attention to detail, and how they handle complex areas like door handles and mirrors reveals skill levels that portfolios alone cannot convey.
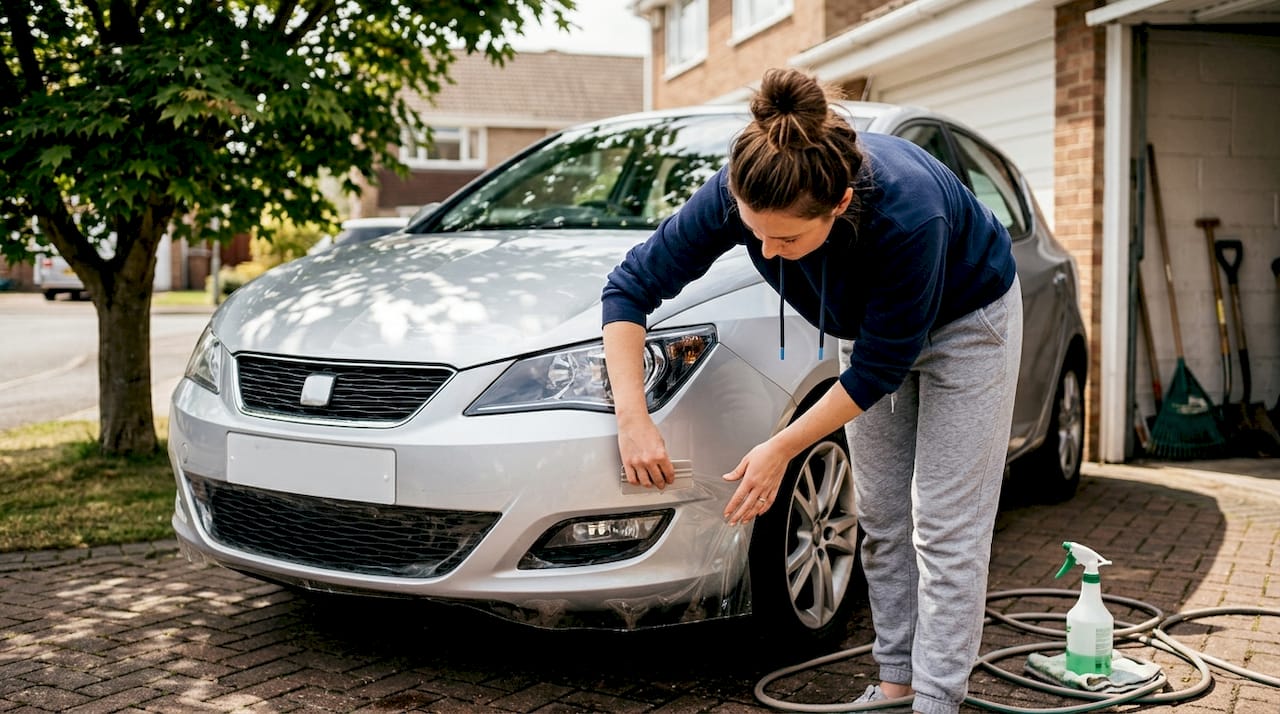
Step-by-step guide to installing protection film yourself
DIY installation demands patience, proper tools, and meticulous technique, but motivated enthusiasts can achieve professional-looking results with practice. Success begins with gathering the right materials and creating an appropriate workspace, as rushing this preparation phase guarantees frustration and wasted film. Choose a clean, enclosed space with consistent temperatures between 18°C and 24°C, as extreme cold makes film brittle whilst excessive heat causes premature adhesive activation.
Essential materials and tools for DIY installation:
| Item | Purpose | Approximate Cost |
|---|---|---|
| Pre-cut PPF kit | Vehicle-specific patterns eliminate cutting errors | £200 to £600 |
| Spray bottle with slip solution | 1% baby shampoo mixture allows film repositioning | £5 |
| Squeegee set | Removes water and air during application | £15 to £30 |
| Heat gun or hair dryer | Activates adhesive and enables stretching | £20 to £80 |
| Microfibre towels | Lint-free cleaning and drying | £10 |
| Isopropyl alcohol 70% | Final surface decontamination | £8 |
Surface preparation determines installation success more than any other factor. Wash your vehicle thoroughly, then clay bar all surfaces receiving film to remove embedded contaminants that create bumps under the applied material. Dry completely with clean microfibre towels, paying special attention to panel gaps and trim edges where water hides. Final wipe down with 70% isopropyl alcohol eliminates any remaining oils or residues that prevent proper adhesion.
Follow these application steps in order for best results:
- Mix your slip solution by adding one teaspoon of baby shampoo to 500ml of distilled water in a spray bottle, creating a slippery surface that allows film repositioning.
- Spray the vehicle surface generously with slip solution immediately before applying each piece, ensuring complete coverage without dry spots.
- Remove the film’s backing liner carefully, spraying the exposed adhesive side liberally with slip solution to prevent premature sticking.
- Position the film piece onto the wet surface, aligning edges and reference points before beginning to squeegee.
- Start squeegeeing from the centre outward using overlapping strokes at 45-degree angles, pushing water and air toward the edges systematically.
- Apply heat to edges and complex curves, gently stretching the film to conform without creating stress points that cause lifting.
- Wrap edges around panel boundaries where appropriate, using heat and firm pressure to ensure adhesive contact on all surfaces.
- Final squeegee pass with moderate pressure removes remaining moisture, followed by edge sealing with focused heat application.
Common mistakes plague first-time installers but are entirely avoidable with awareness. Insufficient slip solution causes the film to grab prematurely, making repositioning impossible and often resulting in permanent creases. Excessive squeegee pressure during initial passes pushes adhesive away from the centre, creating areas that never fully bond. Overheating the film causes adhesive failure and material distortion, whilst inadequate heating leaves edges vulnerable to lifting. Contaminated hands transfer oils to the adhesive side, preventing proper bonding in those areas.
Pro Tip: Work in small sections rather than attempting entire panels at once, especially on your first installation. Mastering a single wing mirror or door handle builds confidence and technique before tackling larger, more visible areas like bonnets and bumpers.
PPF precut patterns installation guide resources demonstrate how computer-cut patterns eliminate the most challenging aspect of DIY application by providing perfectly sized pieces for your specific vehicle model.
Troubleshooting common issues and verifying a quality installation
Even carefully executed installations sometimes develop issues requiring correction, and knowing how to identify and address problems prevents minor flaws from becoming permanent defects. Quality verification should occur immediately after installation and again after 24 hours once the adhesive has fully cured. Understanding the difference between normal appearance during curing and actual installation defects prevents unnecessary panic whilst ensuring genuine problems receive prompt attention.
Bubbles represent the most common post-installation concern, though not all bubbles indicate poor workmanship. Small water bubbles smaller than 2mm typically disappear within a week as moisture evaporates through the film. Larger air bubbles with defined edges require intervention, as they won’t resolve on their own and may expand over time. Gently lift the film edge nearest the bubble, spray slip solution underneath, then re-squeegee the area with firm, overlapping strokes whilst applying moderate heat.
Signs indicating poor installation quality that warrant professional correction:
- Visible dirt, dust, or debris trapped beneath the film surface
- Edge lifting along panel boundaries or trim within 48 hours of installation
- Pronounced creases or wrinkles that don’t smooth with heat application
- Inconsistent film overlap at seams creating visible lines or gaps
- Adhesive residue visible around edges or on adjacent painted surfaces
- Silvering or haziness in curved areas indicating insufficient stretching
Comparing typical defects helps determine whether issues require immediate action:
| Defect Type | Severity | Correction Approach |
|---|---|---|
| Water bubbles under 2mm | Low | Allow 7 days for natural evaporation |
| Air bubbles over 5mm | High | Lift and re-apply section immediately |
| Edge lifting under 3mm | Medium | Apply heat and pressure to re-seal |
| Trapped contamination | High | Remove film section and replace |
| Slight silvering in curves | Medium | Apply focused heat and gentle stretching |
| Visible creases | High | Remove and replace affected section |
For professionally installed film exhibiting defects, document issues with clear photographs and contact your installer within their specified warranty period. Reputable shops stand behind their work and will schedule correction appointments promptly. Explain problems specifically rather than using vague terms, as “the film looks weird” provides less actionable information than “3cm edge lifting along the passenger door bottom trim.”
Car protection film cost guide resources help you understand whether quoted correction costs align with industry standards when dealing with installers outside warranty periods. Quality installations should pass close inspection under direct sunlight, revealing smooth, uniform film application without distortions, contamination, or adhesive failures. Run your hand along all edges to verify they’re sealed flat against surfaces rather than raised or peeling.
Schedule a professional inspection if you’re uncertain whether observed characteristics represent normal curing processes or genuine defects. Many installers offer post-installation checks as part of their service, providing peace of mind and catching potential problems before they worsen. Proper installation verification within the first week ensures your investment delivers the intended protection and aesthetic enhancement for years to come.
Find expert paint protection film services with AEONCUT
Whether you’re a professional installer seeking precision tools or an enthusiast committed to DIY excellence, AEONCUT delivers cutting-edge software solutions that transform protection film application. Our advanced pre-cut pattern technology eliminates measuring errors and material waste, providing exact templates for thousands of vehicle models. Automotive protective film precision value becomes immediately apparent when you compare hand-cutting methods to computer-generated accuracy.

Professional installers using AEONCUT reduce installation time by up to 60% whilst improving consistency across every project. Our cloud-based pattern library updates automatically with new vehicle releases, ensuring you’re always equipped for the latest models entering your shop. Comprehensive car paint protection guide resources and tutorial support help both professionals and DIY users master advanced techniques. Explore how AEONCUT can elevate your protection film capabilities with precision patterns and expert guidance.
Frequently asked questions
What is the average lifespan of protection film on cars?
Most high-quality paint protection films last between 5 to 10 years depending on environmental factors like UV exposure, climate extremes, and maintenance routines. Premium films with self-healing properties and UV stabilisers typically reach the upper end of this range when properly cared for. Regular washing with pH-neutral products and avoiding automatic car washes with harsh brushes significantly extends film lifespan beyond manufacturer estimates.
Can I remove protection film myself without damaging my car’s paint?
Careful, slow peeling under warm conditions can allow safe removal, particularly if the film is relatively new and hasn’t degraded from prolonged UV exposure. Heat the film edges with a hair dryer or heat gun to soften the adhesive, then peel at a 45-degree angle using steady, even pressure. Professional removal is recommended for aged films or if you notice adhesive residue remaining, as improper technique can pull clear coat or leave stubborn residue requiring chemical removers.
How much does professional protection film installation cost locally?
Cost ranges widely based on vehicle size, film type, and installer reputation, with partial coverage starting around £400 and full-vehicle wraps exceeding £3,000 for luxury or large vehicles. Front-end protection covering bonnet, bumper, wings, and mirrors typically costs £800 to £1,500 for mid-size cars. Car protection film cost guide resources provide detailed breakdowns by coverage area and vehicle category to help budget your project accurately.
What should I look for when choosing a local protection film installer?
Check for certifications from major film manufacturers, customer reviews highlighting consistent quality, and portfolios demonstrating experience with your vehicle model and film brand preferences. Evaluate their workspace cleanliness, as professional PPF application requires dust-free environments to prevent contamination under the film. Ask about warranty terms covering both materials and workmanship, with reputable installers offering five to ten-year protection. Paint protection film installers types vary significantly in specialisation, so matching installer expertise to your specific needs ensures optimal results.
Recommended
- How to Apply New Car Paint Protection Near Me for Professionals – AEONCUT PPF Pre-cut Cutting software
- Protection Film for Car Price: Complete Guide – AEONCUT PPF Pre-cut Cutting software
- Protective Film for Cars: Precision, Savings, and Risks – AEONCUT PPF Pre-cut Cutting software
- 7 Key Types of Paint Protection Film Installers Must Know – AEONCUT PPF Pre-cut Cutting software


